
Programming Fundamentals
Lecture 05 – Loops and Images
Edirlei Soares de Lima
<edirlei.lima@universidadeeuropeia.pt>
Loop Statements
•
•
•
You may encounter situations where a
block of code needs to be executed
several times.
A loop statement allows us to execute a
statement or group of statements
multiple times.
Lua loop statements: while, for, repeat

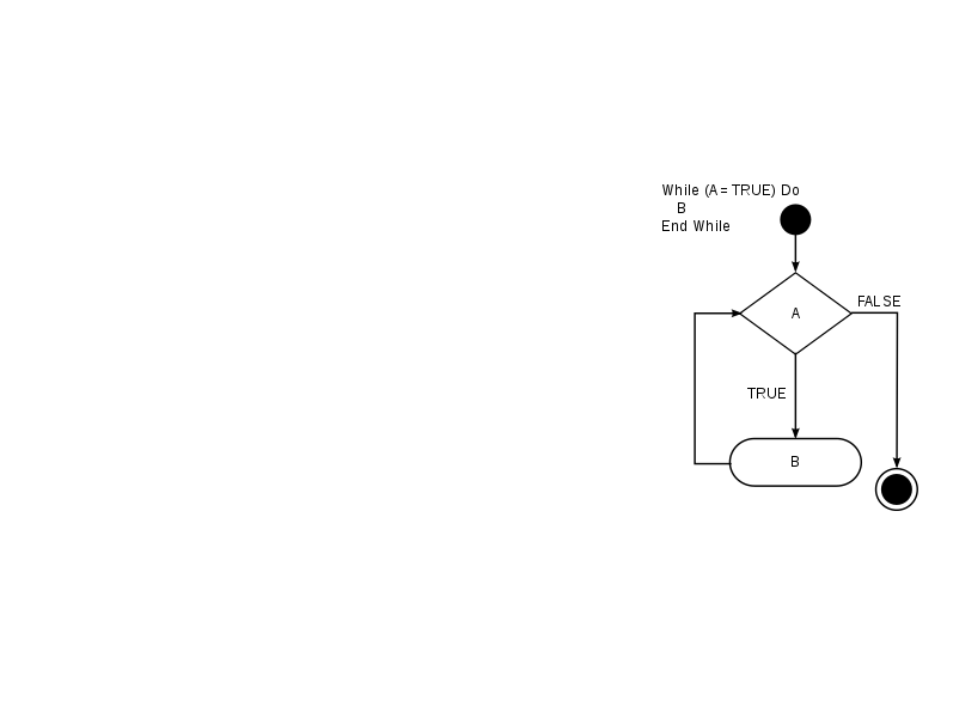
Loop Statements (while)
•
•
The while consists of a block of code and a boolean condition.
The condition is evaluated, and if it is true, the code within
the block is executed. This repeats until the condition
becomes false.
While the “boolean condition” is true,
the “block of code” is executed.
.
..
while boolean_condition do
- block of code
-
When the condition becomes false, the
execution of the program continues to
the code that comes after the block of
code of the while.
end
...

Loop Statements – Example 1
•
Examplo 1:
local i = 0
“
write all numbers between 0
and 100 on screen.”
Implement a program to
while i <= 100 do
io.write(i, "\n")
i = i + 1
end

Loop Statements – Example 2
•
Example 2: “Write a program to read 10 numbers and find their
sum and average”
local i = 0
local sum = 0
local avg = 0
io.write("Input the 10 numbers:\n");
while i < 10 do
local value = io.read()
sum = sum + value
i = i + 1
end
avg = sum / 10.0
io.write("The sum is: ", sum, "\n")
io.write("The Average is: ", avg, "\n")

Loop Statements (for)
•
Another common loop statement is the for.
–
It simplifies the implementation of loops that need to be executed a
specific number of times.
...
for var = initial_value, final_value, increment do
- block of code
-
end
...
•
The block of code will be executed for each value of var,
starting from initial_valueand going to final_value,
using incrementto increment/decrement the value of var.
Loop Statements – Example 1
•
Example 1: “Write all numbers between 0 and 100 on screen.”
local i = 0
while i <= 100 do
io.write(i, "\n")
i = i + 1
for i = 0, 100, 1 do
io.write(i, "\n")
end
end
•
Important:
–
In the for statement, the control variable i is local variable;
–
Never change the value of control variable manually;

Loop Statements – Example 2
•
Example 2: “Write a program to read 10 numbers and find their
sum and average”
local sum = 0
local avg = 0
io.write("Input the 10 numbers:\n");
for i = 1, 10, 1 do
local value = io.read()
sum = sum + value
end
avg = sum / 10.0
io.write("The sum is: ", sum, "\n")
io.write("The Average is: ", avg, "\n")

Loop Statements (repeat)
•
•
The while loop checks the condition before executing the
block of code. Thus, it is often known as a pre-test loop.
Lua offers a third loop statement called repeat:
–
The condition is evaluated after the execution of block of code.
–
This means that the block of code will be executed at least once.
...
repeat
-- block of code
until boolean condition
...

Loop Statements – Example 1
•
Example 1: “Write a program to read 10 numbers and find their
sum and average”
local i = 1
local sum = 0
local avg = 0
io.write("Input the 10 numbers:\n");
repeat
local value = io.read()
sum = sum + value
i = i + 1
until i > 10
avg = sum / 10.0
io.write("The sum is: ", sum, "\n")
io.write("The Average is: ", avg, "\n")

Back to the “Hello World”
•
•
•
In the last version of the “Hello World”, we moved the text and
made it return to the initial position when it reaches the limit
of the screen.
What if we need to do the same with 20 “Hello World’s” at the
same time?
–
Duplicating code is never a good option!
How can we do that?

local px -- position of the text in the x axis
function love.load()
love.graphics.setColor(0, 0, 0)
love.graphics.setBackgroundColor(1, 1, 1)
px = 0
end
function love.update(dt)
px = px + (100 * dt)
if px > love.graphics.getWidth() then
px = 0
end
end
function love.draw()
love.graphics.print("Hello World", px, 300)
end

local px -- position of the text in the x axis
function love.load()
love.graphics.setColor(0, 0, 0)
love.graphics.setBackgroundColor(1, 1, 1)
px = 0
end
function love.update(dt)
px = px + (100 * dt)
if px > love.graphics.getWidth() then
px = 0
end
end
function love.draw()
for y = 0, 20, 1 do
love.graphics.print("Hello World", px, y * 30)
end
end
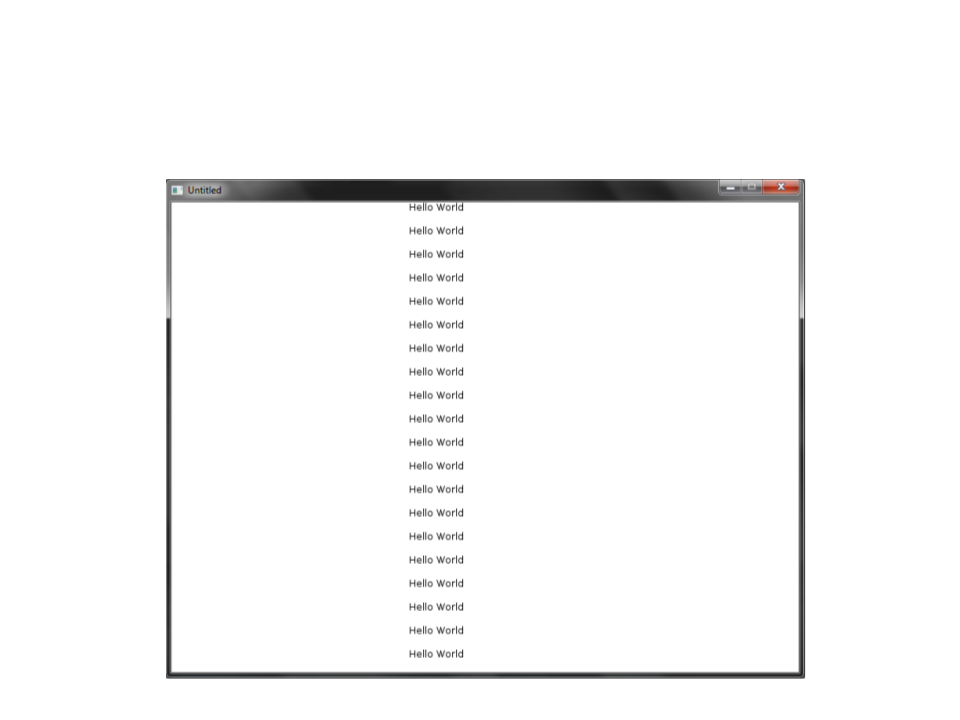
Back to the “Hello World”

ImageType
•
Games are not created using only geometric shapes. Usually
2
D games use images to represent characters, objects and
environments.
•
•
Löve offers a especial data type called image.
We can load a new image using the function:
image = love.graphics.newImage(filename)
•
We can draw an image using the function:
love.graphics.draw(drawable, x, y, r, sx, sy, ox, oy, kx, ky)
ImageType
•
•
To draw an image on screen, two steps are required:
–
Load the image with the function love.graphics.newImage
–
Draw the image with the function love.graphics.draw
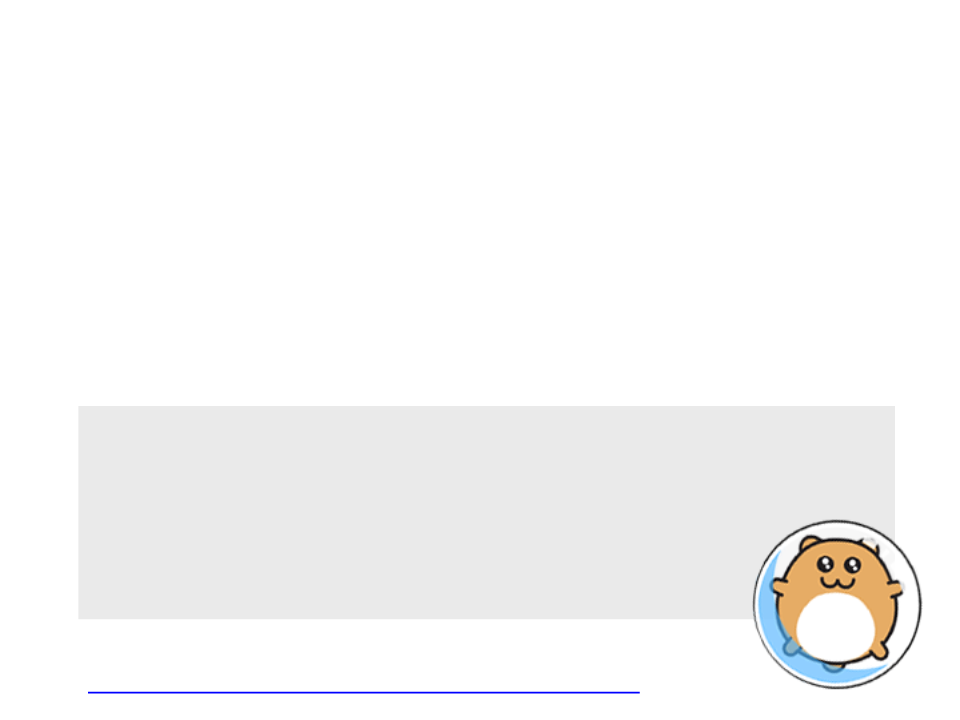
Example:
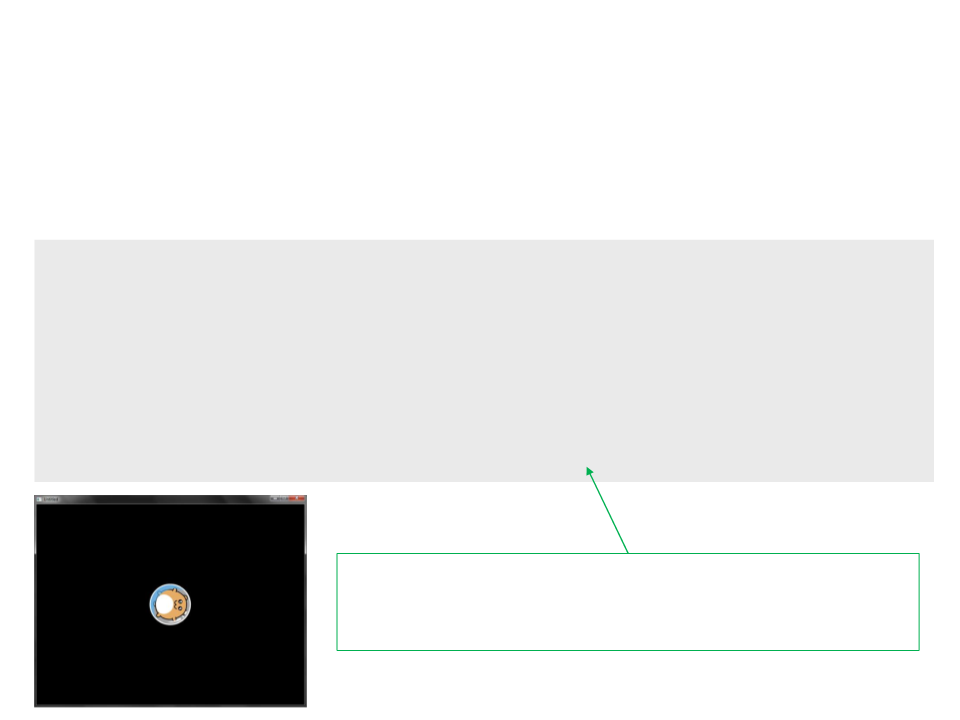
function love.load()
hamster = love.graphics.newImage("hamster.png")
end
function love.draw()
love.graphics.draw(hamster, 325, 225)
end

ImageType
ImageType
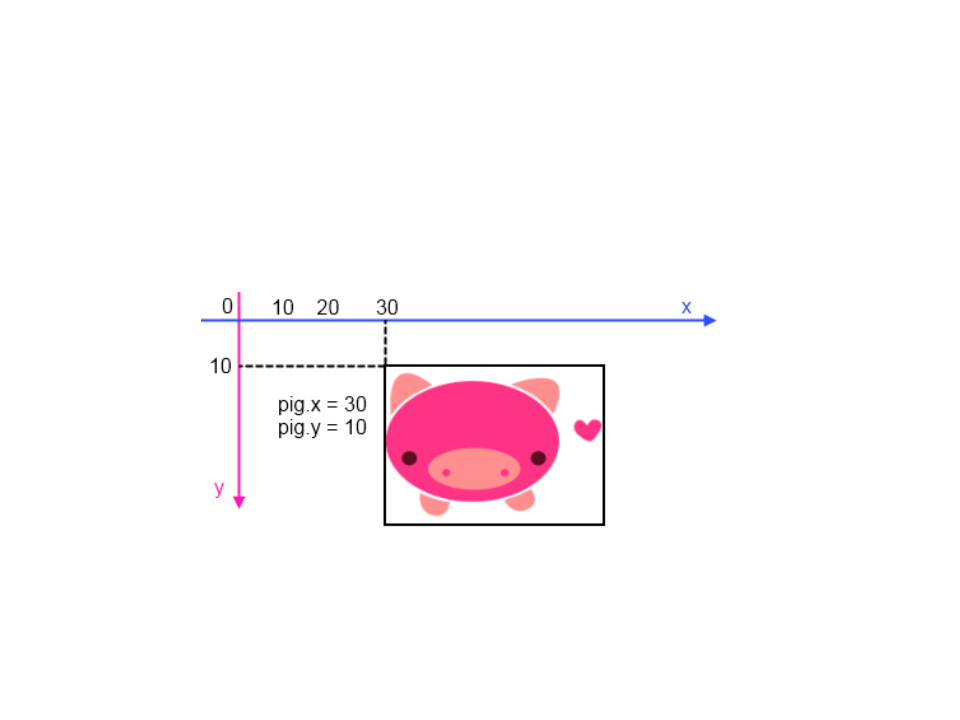
•
By default, images are drawn with the origin located at the
top left corner:
•
Is possible to change the origin point with some addicional
parameters of the love.graphics.drawfunction.
ImageType
•
The function love.graphics.drawhas several optional
parameters:
love.graphics.draw(drawable, x, y, r, sx, sy, ox, oy, kx, ky)
–
–
–
–
–
–
–
–
–
–
drawable: image or other object that can be drawn on screen;
x: position to draw the object (x-axis);
y: position to draw the object (y-axis);
r: orientation of the object (radians).
sx: scale factor (x-axis);
sy: scale factor (y-axis);
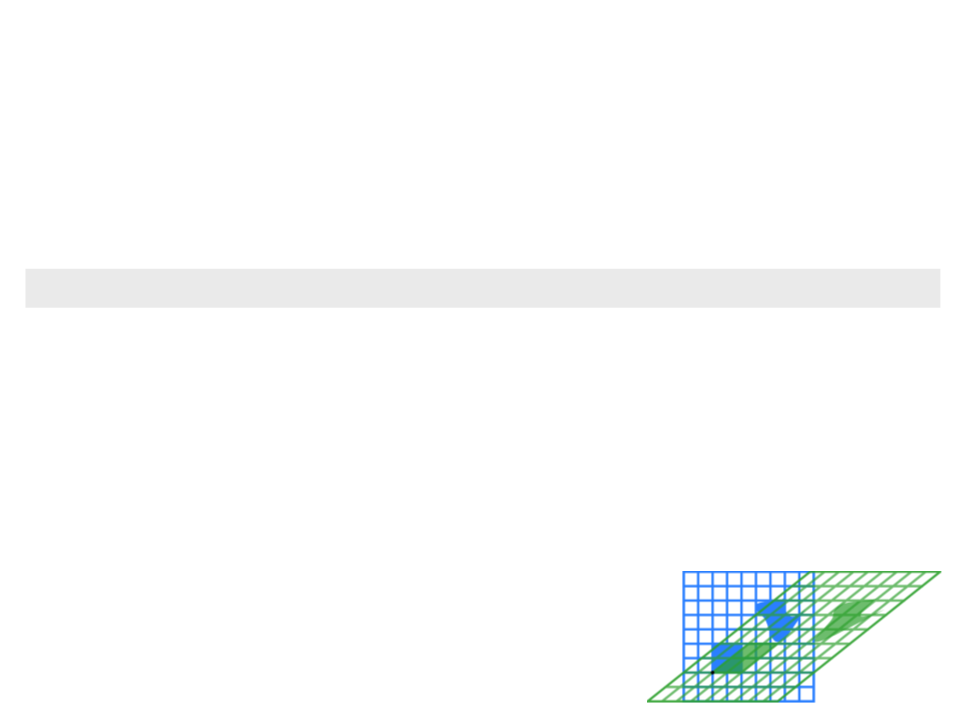
What is shearing fator?
ox: origin offset (x-axis);
oy: origin offset (y-axis);
kx: shearing factor (x-axis).
ky: shearing factor (y-axis).
ImageType
•
Example:
function love.load()
hamster = love.graphics.newImage("hamster.png")
end
function love.draw()
love.graphics.draw(hamster, 400, 300, math.rad(90), 1, 1,
hamster:getWidth()/2, hamster:getHeight()/2)
end
Notice that we can get the width and height of an image
with the functions hamster:getWidth()and
hamster:getHeight()
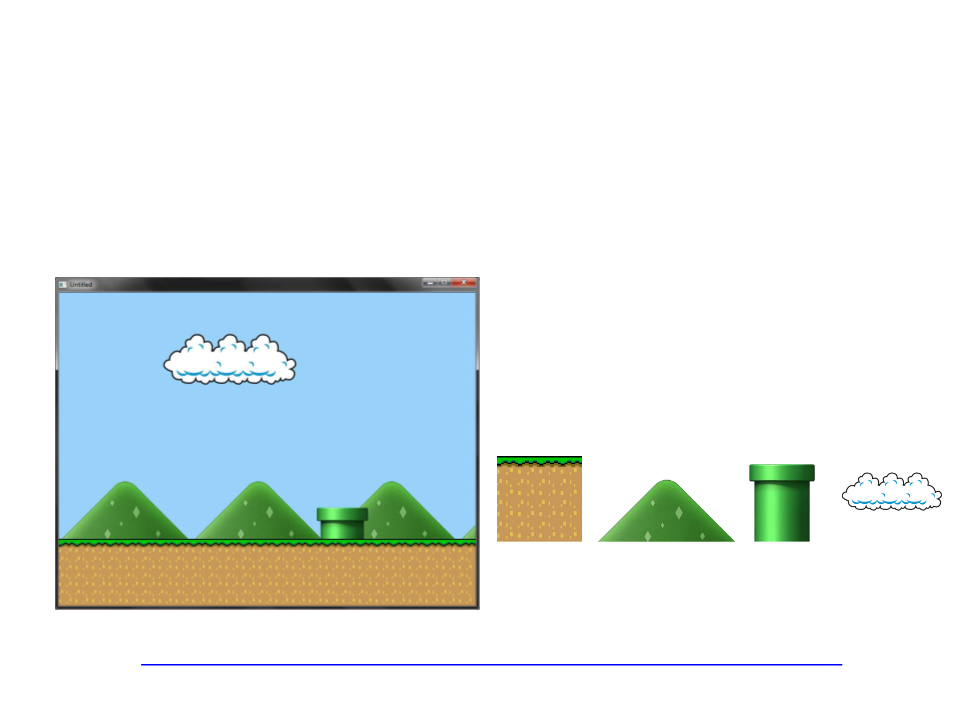
Exercise 1
1
) Write a program to draw a scene like the one illustrated
bellow:
Important: you need to use loop statements
to drawn the images that are repeated
several time (ground and mountains).