
Game Frameworks
Lecture 04: 2D Camera in Unity
Edirlei Soares de Lima
<edirlei.lima@universidadeeuropeia.pt>
Unity – Camera Component
•
•
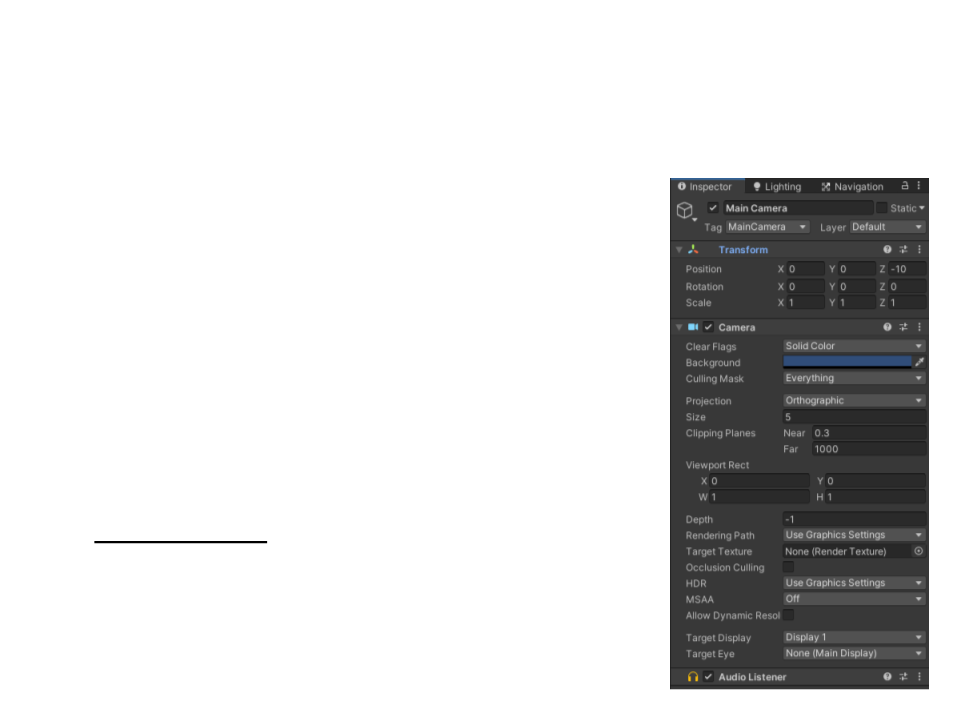
Cameras are the devices that capture and
display the world to the player.
–
A scene can have an unlimited number of
cameras.
–
Cameras can be set to render in any order, at
any place on the screen, or only certain parts
of the screen.
For 2D games, cameras are usually set to
Orthographic, which removes all
perspective from the Camera’s view.

Camera Movement – Example 1
•
Example 1: Following the player on X axis (fixed camera)
public class CameraController : MonoBehaviour
{
private Transform player;
private void Start()
{
player = GameObject.FindWithTag("Player").transform;
}
private void LateUpdate()
{
transform.position = new Vector3(player.position.x,
transform.position.y,
transform.position.z);
}
}

Camera Movement – Example 2
•
Example 2: Following a target position (smooth camera movement)
public class PlayerMovement : MonoBehaviour{
..
.
private SpriteRenderer spriteRenderer;
private void Start(){
.
..
spriteRenderer = GetComponent<SpriteRenderer>();
}
void FixedUpdate(){
float horizontalInput = Input.GetAxis("Horizontal");
.
..
if ((horizontalInput > 0) && (spriteRenderer.flipX)){
spriteRenderer.flipX = false;
}
else if((horizontalInput < 0) && (!spriteRenderer.flipX)){
spriteRenderer.flipX = true;
}
...
}
}

Camera Movement – Example 2
•
Example 2: Following a target position (smooth camera movement)
public class CameraController : MonoBehaviour{
private SpriteRenderer player;
private Vector3 targetPosition;
public float targetOffset = 4;
public float adjustOffsetSpeed = 2.5f;
private void Start(){
player = GameObject.FindWithTag("Player").GetComponent<SpriteRenderer>();
}
private void FixedUpdate(){
if (player.flipX){
targetPosition = new Vector3(player.transform.position.x –
targetOffset, transform.position.y, transform.position.z);
}
else{
targetPosition = new Vector3(player.transform.position.x +
targetOffset, transform.position.y, transform.position.z);
}
transform.position = Vector3.Lerp(transform.position, targetPosition,
adjustOffsetSpeed * Time.deltaTime);
}
}
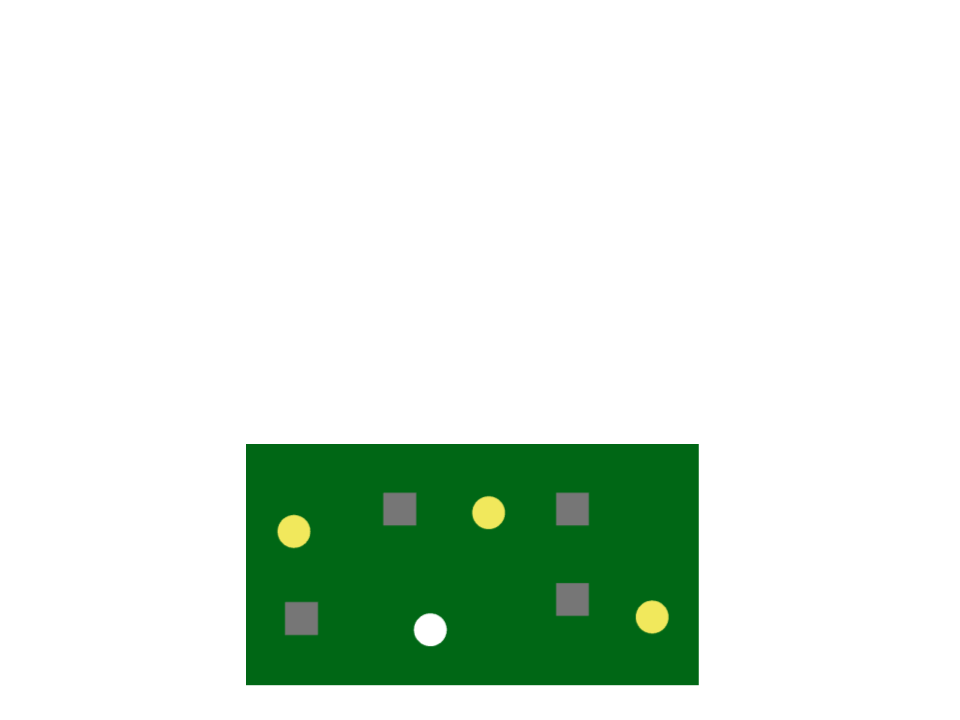
Exercise 1
1
) Implement the camera movement for a top-down perspective.
–
–
–
The camera must move on X and Y axis according to the player
movement.
Use the example of top-down perspective created during for physics
class.
Implement two versions of the code:
1
.
A fixed camera movement (player always in the center of the screen);
2.
A smooth camera movement that follows a target position;
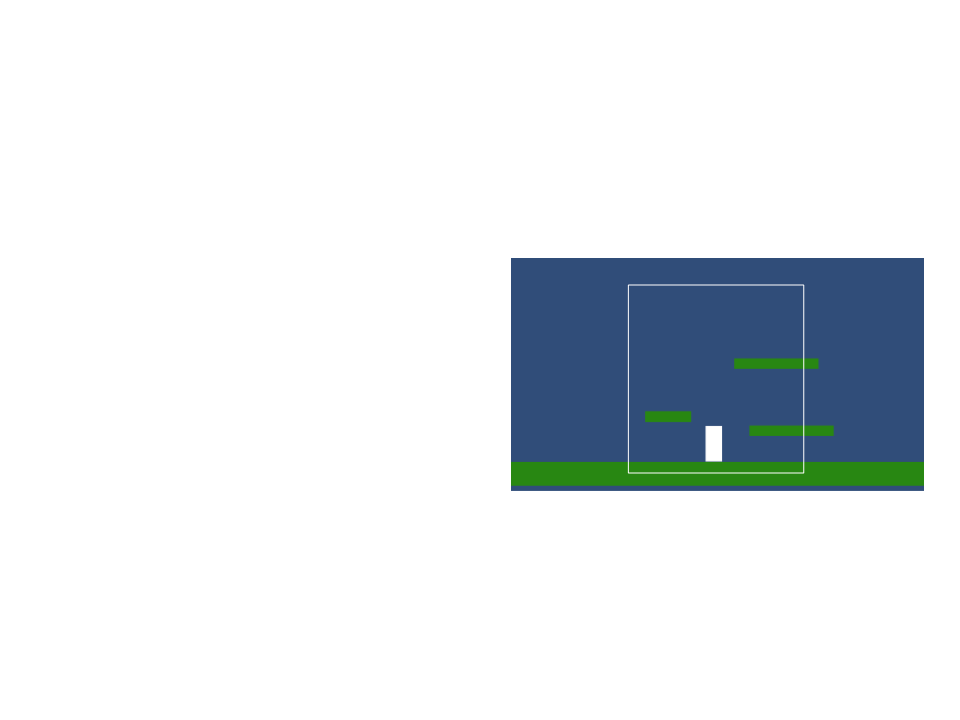
Exercise 2
2
) A common method to control the camera involves creating an
imaginary rectangle around the player.
•
When the player moves inside the
area of the rectangle, the camera
does not move.
•
When the player tries to move to
outside of the rectangle, the
camera moves to make sure the
player is always inside of the
rectangle.
•
Implement this camera using the
code created for 2D platform game
example.
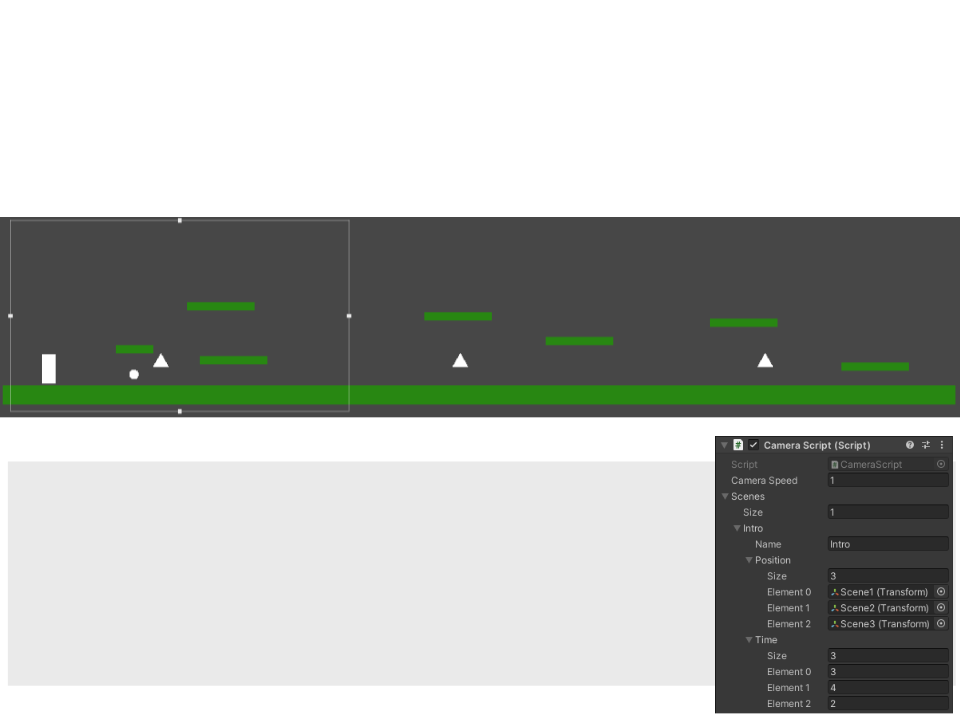
Camera Movement – Example 3
•
Example 3: Cinematic Camera
[
Serializable]
public struct SceneData
{
public string name;
public Transform[] position;
public float[] time;
}
.
..

Camera Movement – Example 3
•
Example 3: Cinematic Camera
public class CameraScript : MonoBehaviour
{
public float cameraSpeed = 2.5f;
public SceneData[] scenes;
private int currentScene = -1;
private int currentScenePosition = -1;
private float currentSceneTimer = 0;
private int GetScene(string name)
{
for (int i = 0; i < scenes.Length; i++)
{
if (scenes[i].name == name)
{
return i;
}
}
return -1;
}
.
..

Camera Movement – Example 3
•
Example 3: Cinematic Camera
public void StopScene(){
currentScene = -1;
GetComponent<CameraController>().enabled = true;
GameObject.FindWithTag("Player").GetComponent<PlayerMovement>().enabled = true;
currentScenePosition = 0;
}
public void PlayScene(string name){
currentScene = GetScene("Intro");
if (currentScene != -1)
{
GetComponent<CameraController>().enabled = false;
GameObject.FindWithTag("Player").GetComponent<PlayerMovement>().enabled
=
false;
currentScenePosition = 0;
currentSceneTimer = 0;
}
}
void Start(){
PlayScene("Intro");
}

Camera Movement – Example 3
•
Example 3: Cinematic Camera
void Update(){
if (currentScene != -1){
if (currentScenePosition < scenes[currentScene].position.Length){
Vector3 target = new Vector3(scenes[currentScene].position
[
currentScenePosition].position.x,
transform.position.y, transform.position.z);
transform.position = Vector3.Lerp(transform.position, target,
cameraSpeed * Time.deltaTime);
if (Vector3.Distance(transform.position, target) < 1){
currentSceneTimer += Time.deltaTime;
if (currentSceneTimer > scenes[currentScene].time[currentScenePosition]){
currentScenePosition++;
currentSceneTimer = 0;
}
}
}
else{
StopScene();
}
}
}
}

Further Reading
•
Unity User Manual, Available at: https://docs.unity3d.com/2020.1/
Documentation/Manual/
–
2D
•
Gameplay in 2D
2D Sorting
•
–
Graphics
•
Cameras
•
Books
–
Jeremy G. (2017). Introduction to Game Design, Prototyping, and
Development: from the Concept to Playable Game - with Unity and C# (2nd
ed.). Boston, MA: Addison-Wesley Professional. ISBN: 978-0134659862
–
Hocking, J. (2018). Unity in Action: Multiplatform Game Development in C#
(
2nd ed.). Shelter Island, NY: Manning Publications. ISBN: 978-1617294969