
Game Frameworks
Lecture 02: Introduction to Unity for 2D Game
Development
Edirlei Soares de Lima
<edirlei.lima@universidadeeuropeia.pt>
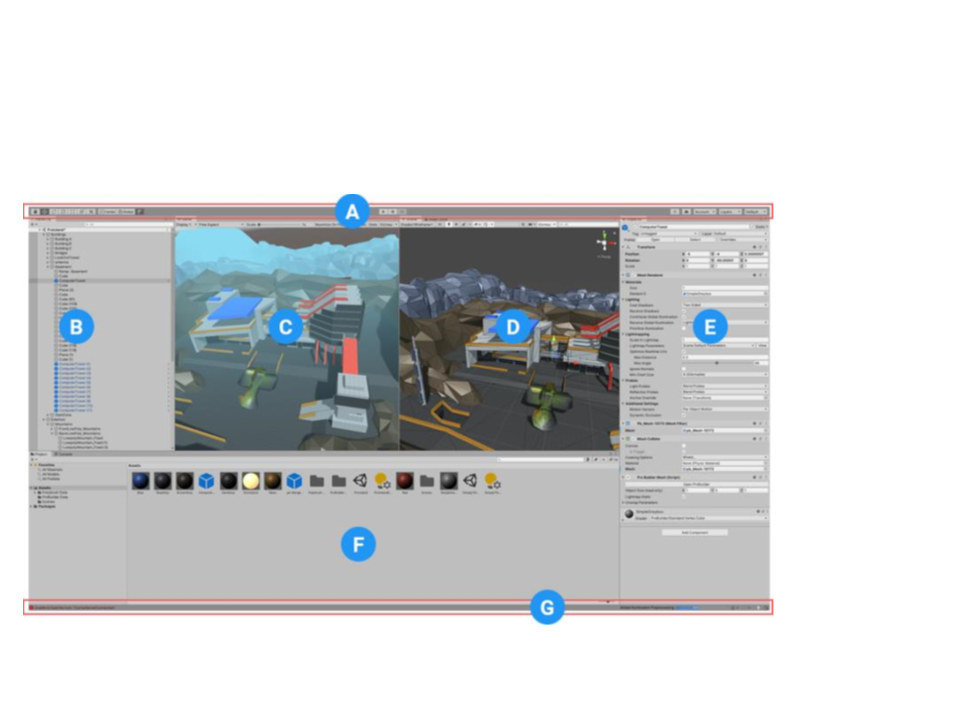
Unity – Interface
(
(
(
(
(
(
(
A) Toolbar
B) Hierarchy
C) Game View
D) Scene View
E) Inspector
F) Project
G) Status Bar
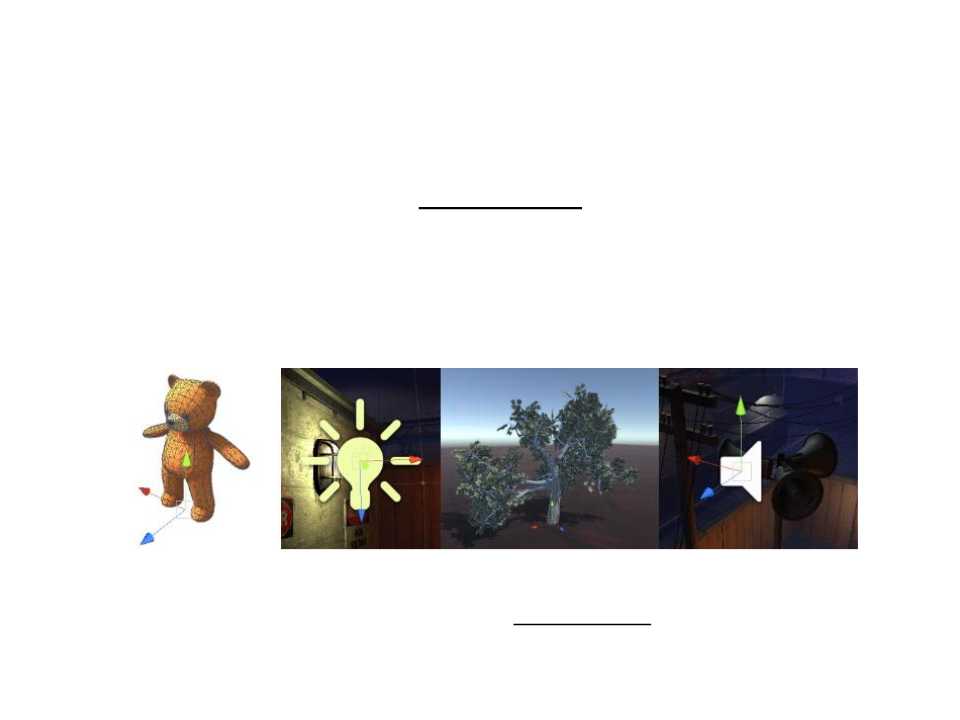
Unity – GameObjects
•
Every object in Unity is a GameObject (characters, collectible
items, lights, cameras, special effects, etc.).
–
However, a GameObject can not do anything on its own: you need to
add components so it can become a character or a special effect.
–
GameObjects act as containers for Components.
Unity – GameObjects
•
Examples:
–
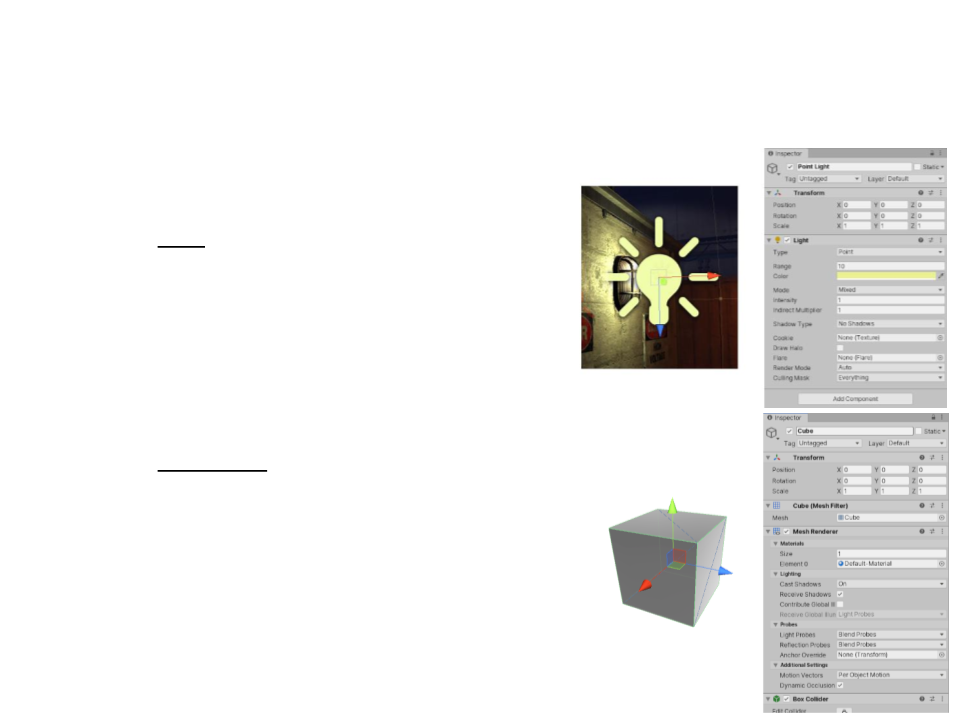
A light is created by attaching a Light
component to a GameObject.
–
A solid cube object has a Mesh Filter
and Mesh Renderer component, to
draw the surface of the cube, and a
Box Collider component to represent
the object’s solid volume in terms of
physics.
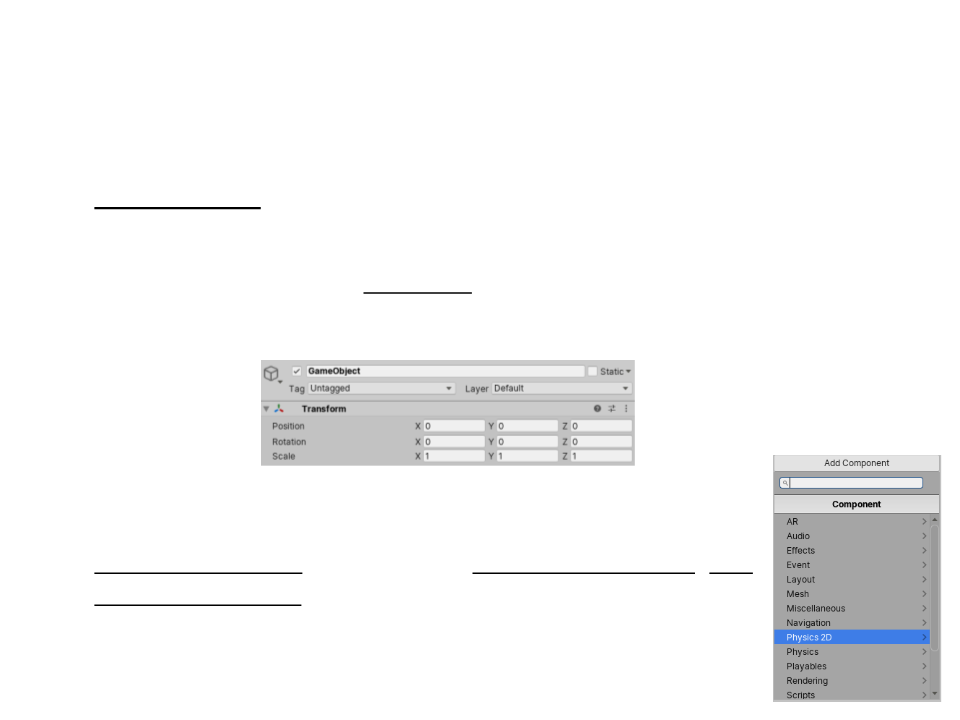
Unity – Components
•
Components define the behavior of a GameObject.
•
Every GameObject has a Transform component.
–
The Transform defines the GameObject’s position, rotation, and scale in the game
world.
•
Components can be added to GameObjects through the
Components Menu or through the Component Browser (Add
Component button in the object’s inspector).
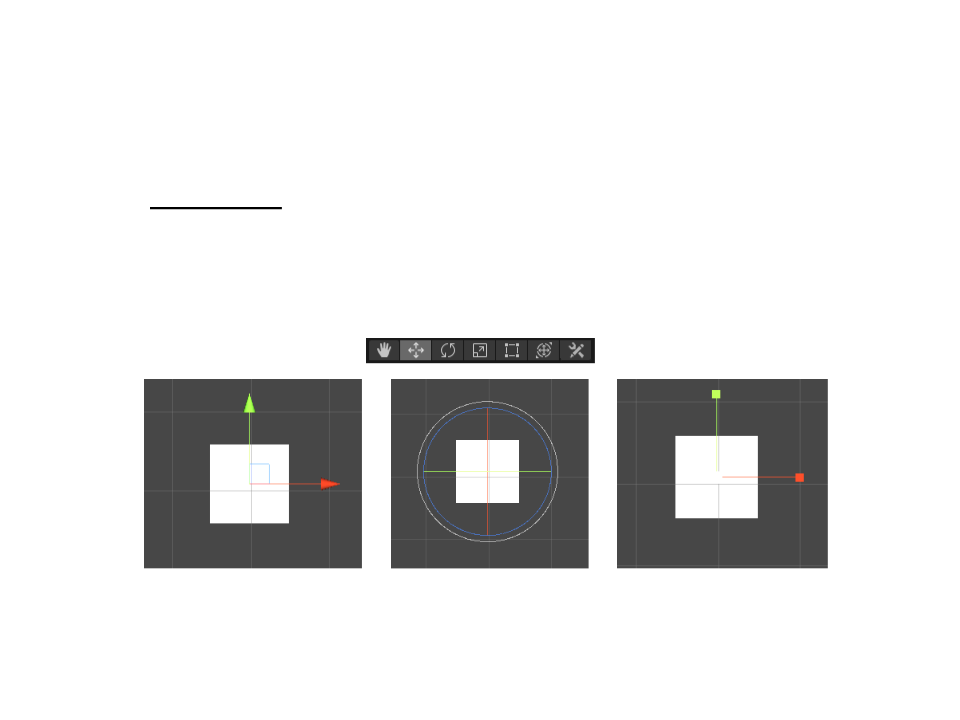
Unity – Transforms
•
The Transform component is used to store a GameObject’s
position, rotation, scale and parenting state.
–
Transforms are manipulated in 3D space in the X, Y, and Z axes or in 2D
space in just X and Y.
translate
rotate
scale
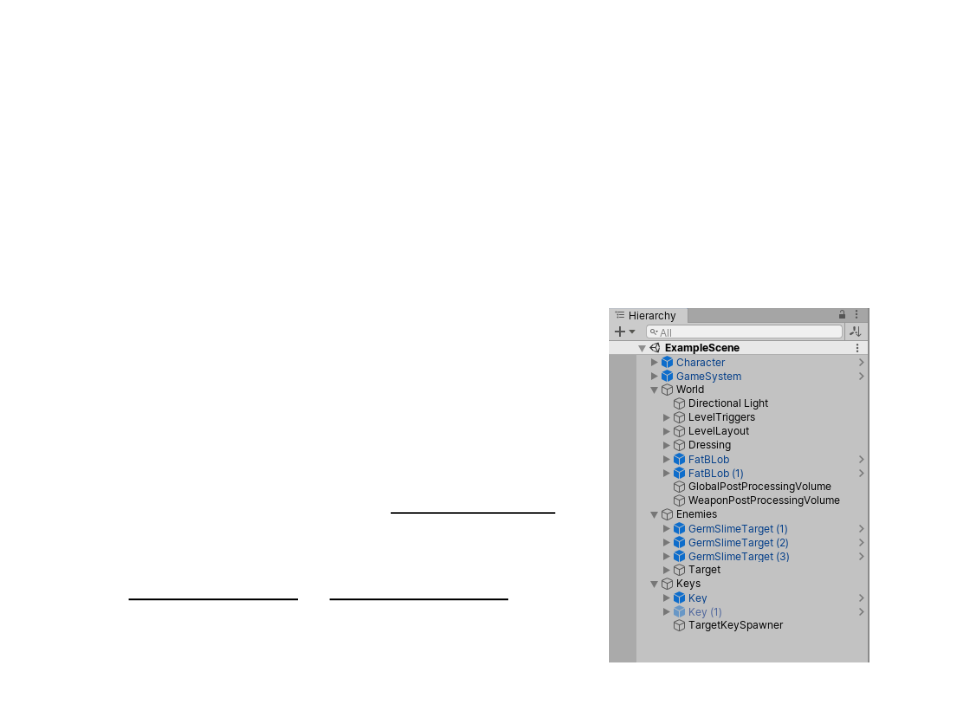
Unity – Parenting
•
When a GameObject is a Parent of another GameObject, the
Child GameObject will move, rotate, and scale exactly as its
Parent does.
•
Parent is created by dragging any GameObject
in the Hierarchy View onto another.
•
Transform values in the Inspector for any child
GameObject are displayed relative to the
Parent’s Transform values (local coordinates).
•
Local coordinates vs global coordinates.
2
D Graphics in Unity
•
Unity is famous for its 3D capabilities, but it can also be used
to create 2D games.
•
Graphic objects in 2D are known as Sprites.
•
Sprites are rendered with a Sprite Renderer
component rather than the Mesh Renderer used
with 3D objects.
•
Unity has a separate physics engine for handling
2
D physics so as to make use of optimizations only
available with 2D.
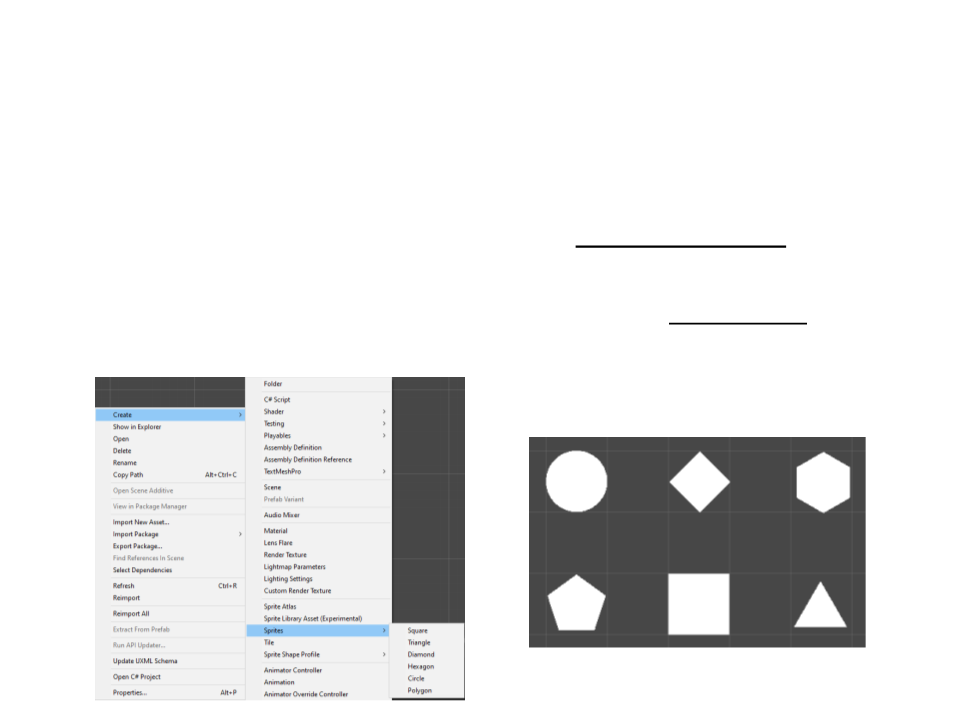
2
D Graphics – Primitive Sprites
•
Unity can import sprites created with any image editor.
However, there are also a number of primitive sprites that can
be created directly within Unity.
–
These primate sprites offer a quick way to create placeholders and
prototypes for testing purposes.
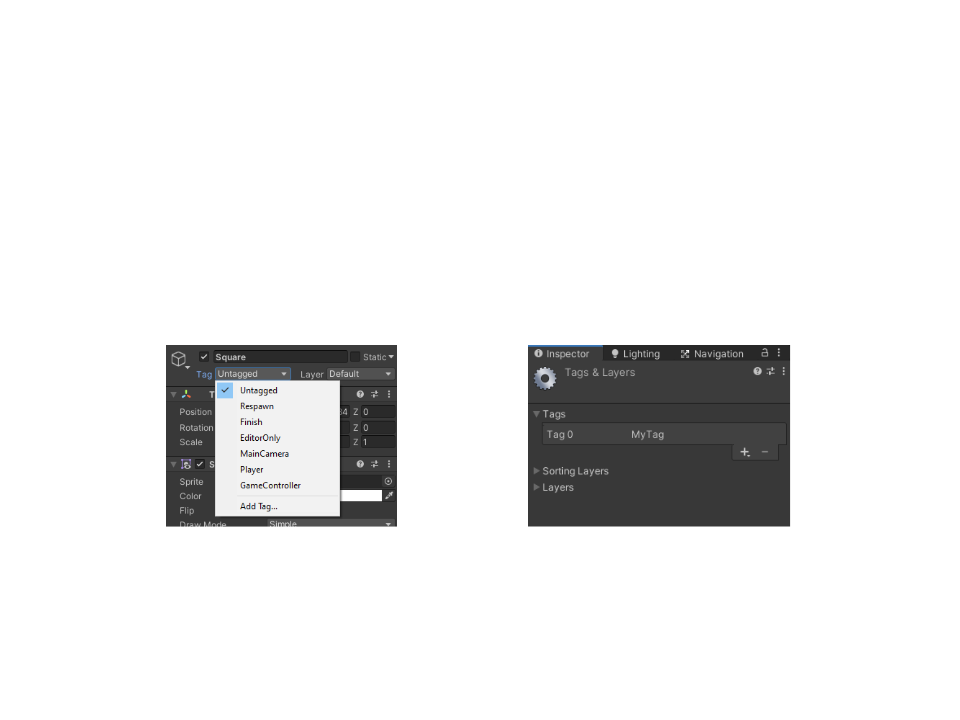
Unity – Tags
•
A Tag is a reference word which you can assign to one or more
GameObjects.
–
Tags are useful to identify GameObjects for scripting purposes: finding
an object by its tag, identify collision objects, etc.
–
–
Once you name a Tag, it cannot be renamed later.
A GameObject can only have one Tag assigned to it.
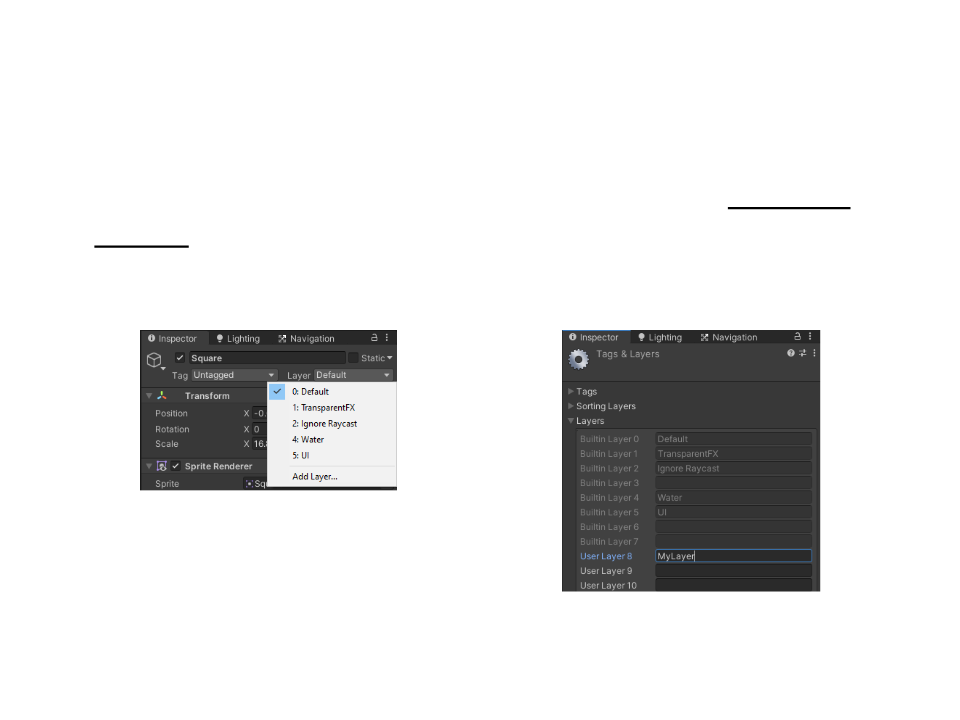
Unity – Layers
•
A Layer is a reference word that can be to create groups of
objects that share characteristics.
–
Layers are commonly used to render only a part of the scene or to
perform selectively collision detection.
–
A GameObject can only have one Layer assigned to it.
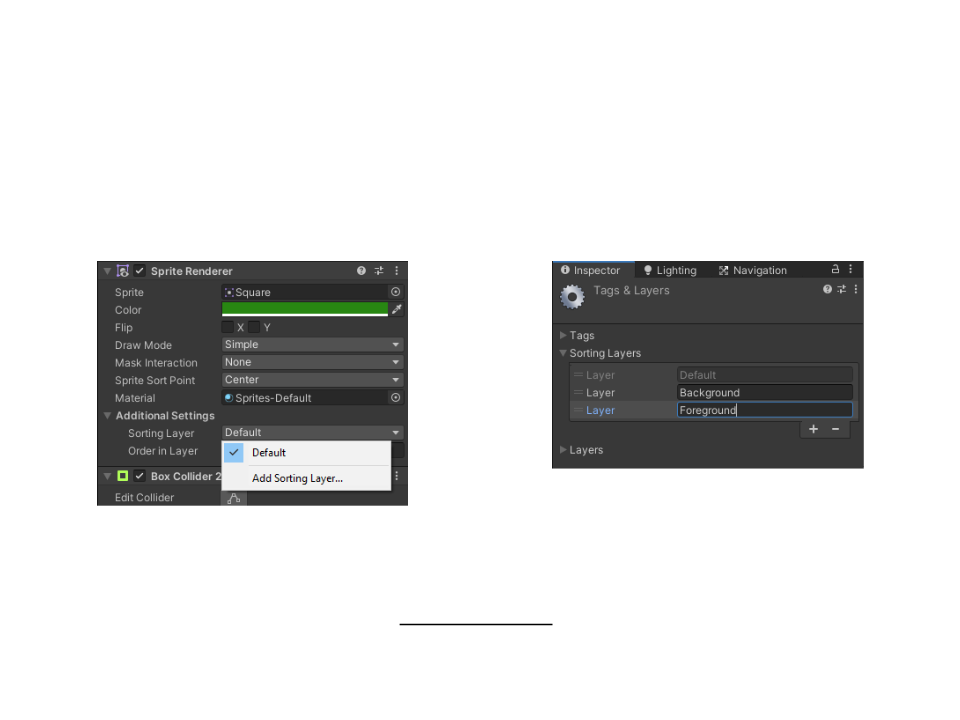
Unity – Sorting Layers
•
Sorting Layers are used in conjunction with Sprites to define
the overlay order of different Sprites.
–
–
To change their order, drag the handle at the left-hand side of each
Layer item.
Change the value of the Order in Layer to set the Renderer’s priority
among other Renderers within the same Sorting Layer.
Unity – Prefabs
•
Prefabs allows you to create, configure, and store a complete
GameObject with all its components, property values, and
child GameObjects as a reusable Asset.
–
The Prefab acts as a template from which you can create new Prefab
instances in the Scene.
–
Any edits that you make to a Prefab Asset are automatically reflected
in all instances of that Prefab.
Unity – Scripting
•
The behavior of GameObjects is controlled by the Components
that are attached to them, which can be a Unity Component or
a custom Component created using scripts.
–
Unity supports the C# programming language natively.
using UnityEngine;
using System.Collections;
public class MyScript : MonoBehaviour {
/
/ Use this for initialization
void Start () {
}
/
/ Update is called once per frame
void Update () {
}
}

Unity – Scripting
•
Basic MonoBehaviour Events:
–
Update: handles the frame update for the GameObject (a loop).
–
Start: is called by Unity before gameplay begins (i.e. before the Update
function is called for the first time) and is an ideal place to do any initialization.
using UnityEngine;
using System.Collections;
public class MyScript : MonoBehaviour {
/
/ Use this for initialization
void Start () {
}
/
/ Update is called once per frame
void Update () {
}
}
Scripting – Hello World
•
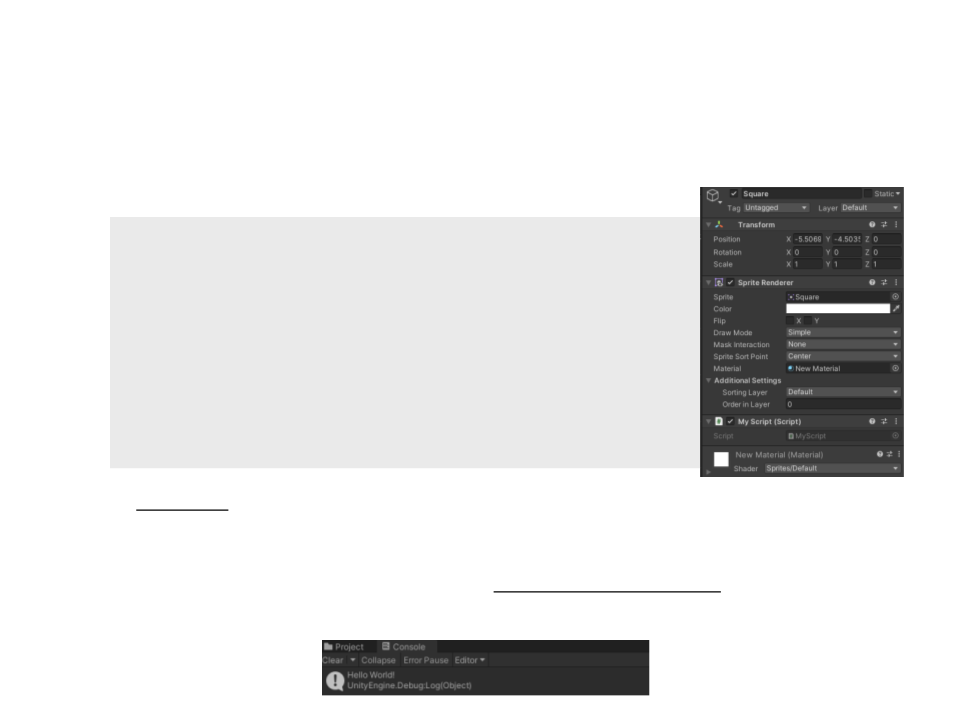
Example 1: Hello World
using UnityEngine;
using System.Collections;
public class MyScript : MonoBehaviour {
void Start () {
Debug.Log("Hello World!");
}
}
–
–
Debug.Log is a function that prints a message to Unity’s console output (usually used
for debug).
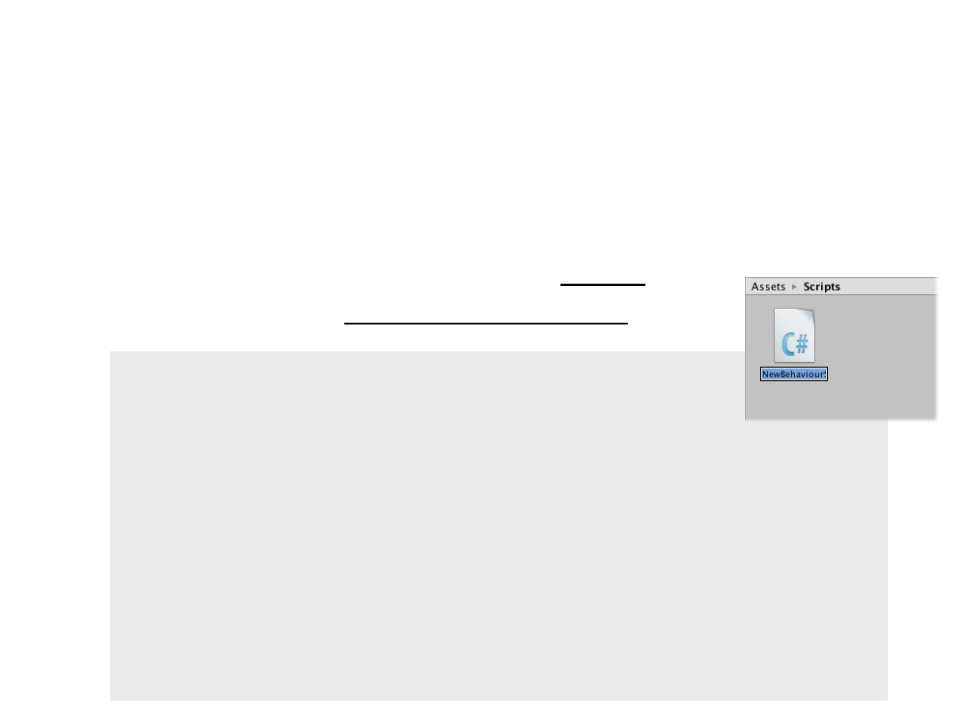
A script only defines a blueprint for a Component. Therefore, none of its code will be
executed until an instance of the script is attached to a GameObject.
•
The script can be attached by dragging the script to a GameObject in the inspector or added through the Add
Component button.
Scripting – Variables and Inspector
•
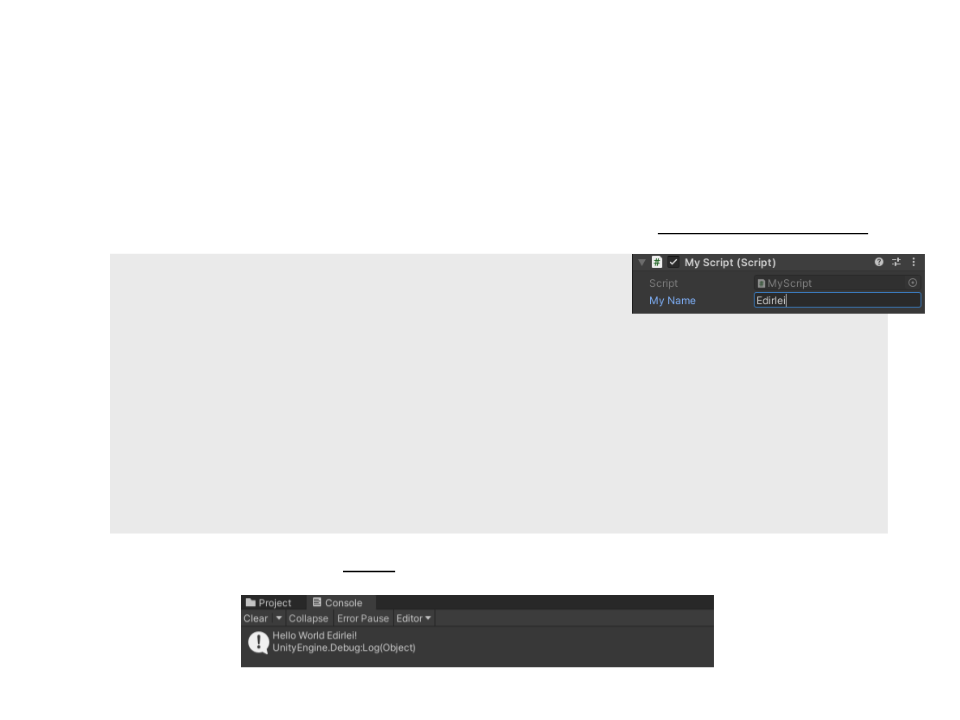
Example 2: Hello World With Name
–
Like other Components, scripts can have properties that are editable in the inspector:
using UnityEngine;
using System.Collections;
public class MyScript : MonoBehaviour {
public string myName;
void Start () {
Debug.Log("Hello World " + myName + "!");
}
}
–
In Unity, variables must public to be visible in the Inspector (or use the SerializeField
tag).

Scripting – Update Function
•
Example 3: Moving Transforms
public class MyScript : MonoBehaviour
{
public float distancePerFrame = 0.02f;
private void Update()
{
transform.Translate(Vector2.right * distancePerFrame);
}
}
–
Problem: frame time is not constant, so the object will move at an irregular speeds in
different computers. Solution: delta time (time in seconds since the last frame).
public class MyScript : MonoBehaviour
{
public float distancePerSecond = 2.0f;
private void Update()
{
transform.Translate(Vector2.right * distancePerSecond *
Time.deltaTime);
}
}
Scripting – Accessing Components
•
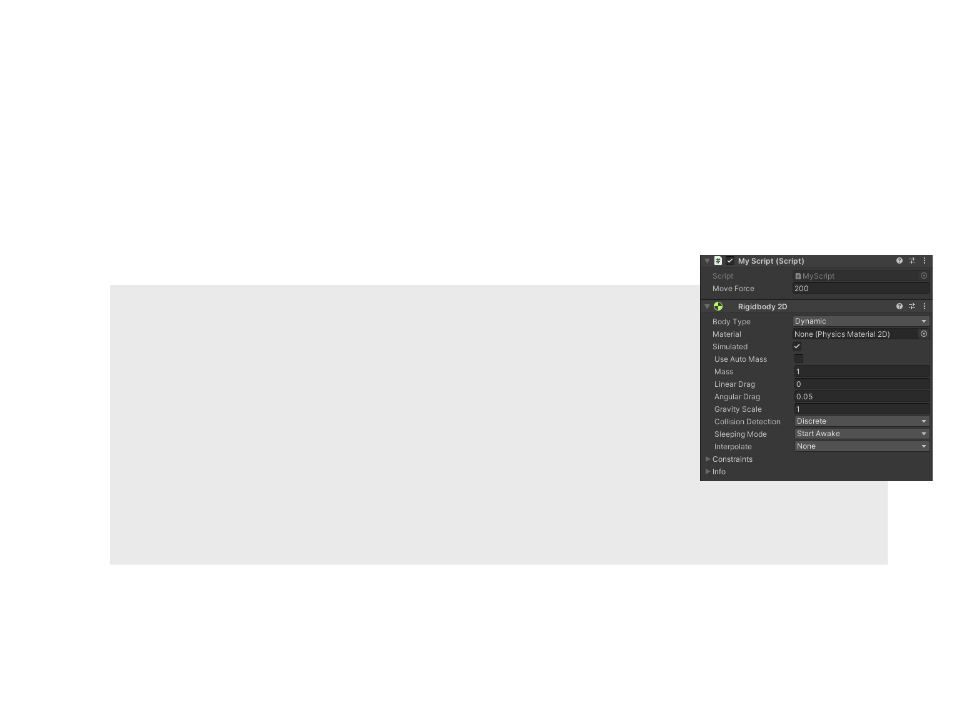
Example 4: Accessing a Rigidbody2D Component
–
Sometimes, a script needs access to other Components attached to the same
GameObject to access/change a property or call a function.
public class MyScript : MonoBehaviour
{
public float moveForce = 200.0f;
private Rigidbody2D rigidBody;
private void Start()
{
rigidBody = GetComponent<Rigidbody2D>();
rigidBody.mass = 2;
rigidBody.AddForce(Vector2.right * moveForce);
}
}
Scripting – Accessing Other Objects
•
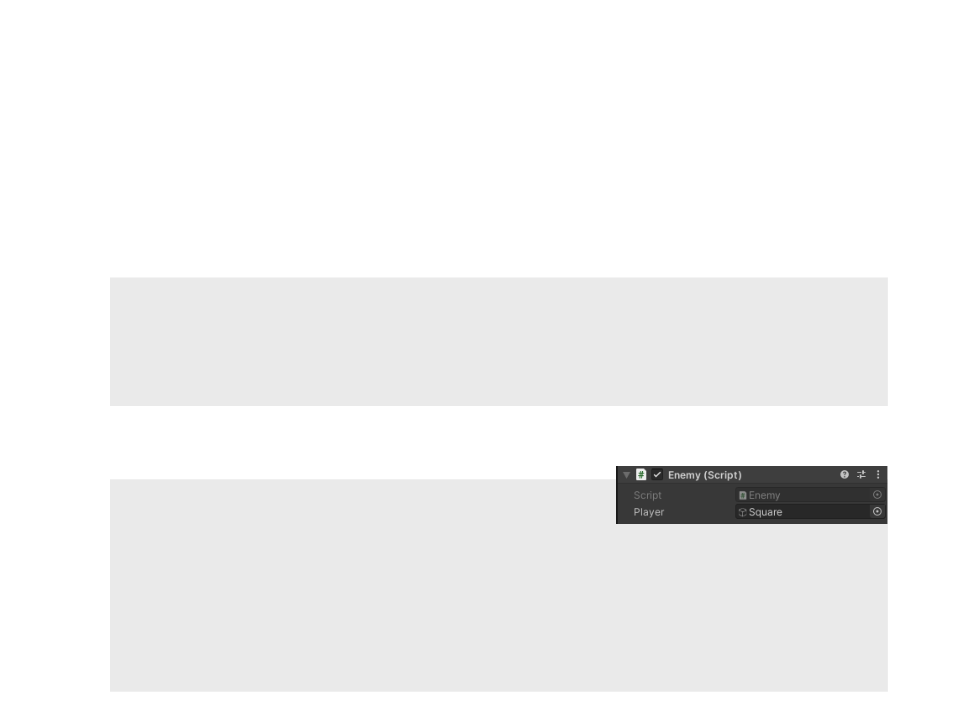
Example 5: Linking GameObjects with Variables
–
The most straightforward way to find a related GameObject is to add a public
GameObject variable to the script:
public class Enemy : MonoBehaviour
{
public GameObject player;
.
..
}
–
The variable will be visible in the Inspector and can be assigned by dragging and
dropping an object from the scene.
public class Enemy : MonoBehaviour
{
public GameObject player;
void Update()
{
Debug.Log("Player is at: " + player.transform.position);
}
}
Scripting – Accessing Other Objects
•
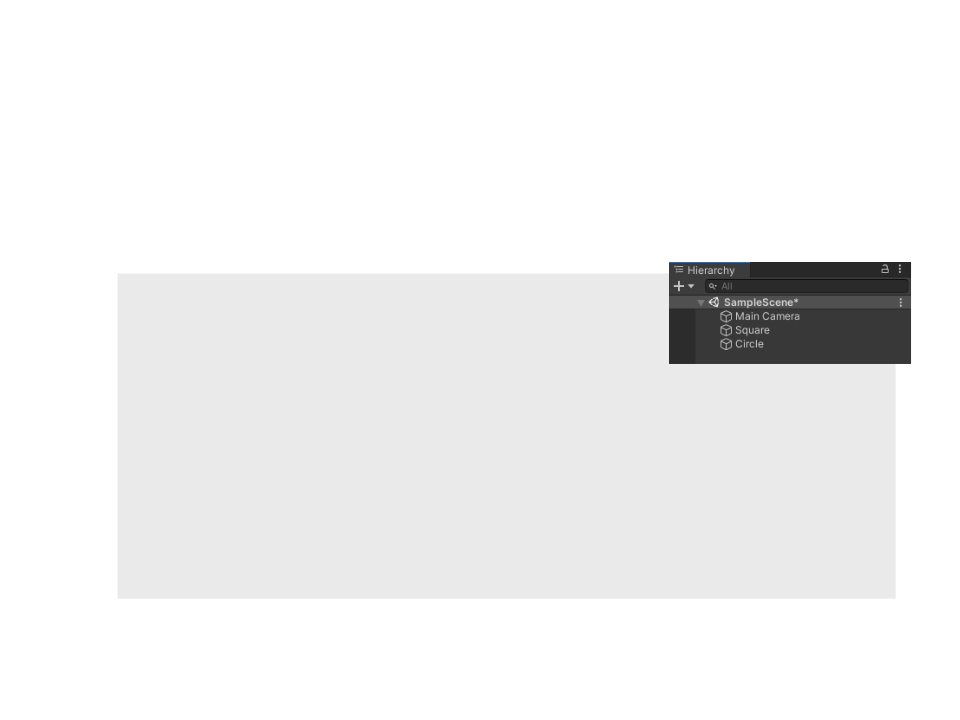
Example 6: Finding GameObjects by Name
– It is always possible to locate GameObjects anywhere in the Scene hierarchy as long as
you have some information to identify them (name or tag).
public class Enemy : MonoBehaviour
{
private GameObject player;
private void Start()
{
player = GameObject.Find("Square");
}
void Update()
{
Debug.Log("Player is at: " + player.transform.position);
}
}
–
Important: for performance reasons, it is recommended to not use this function every
frame.
Scripting – Accessing Other Objects
•
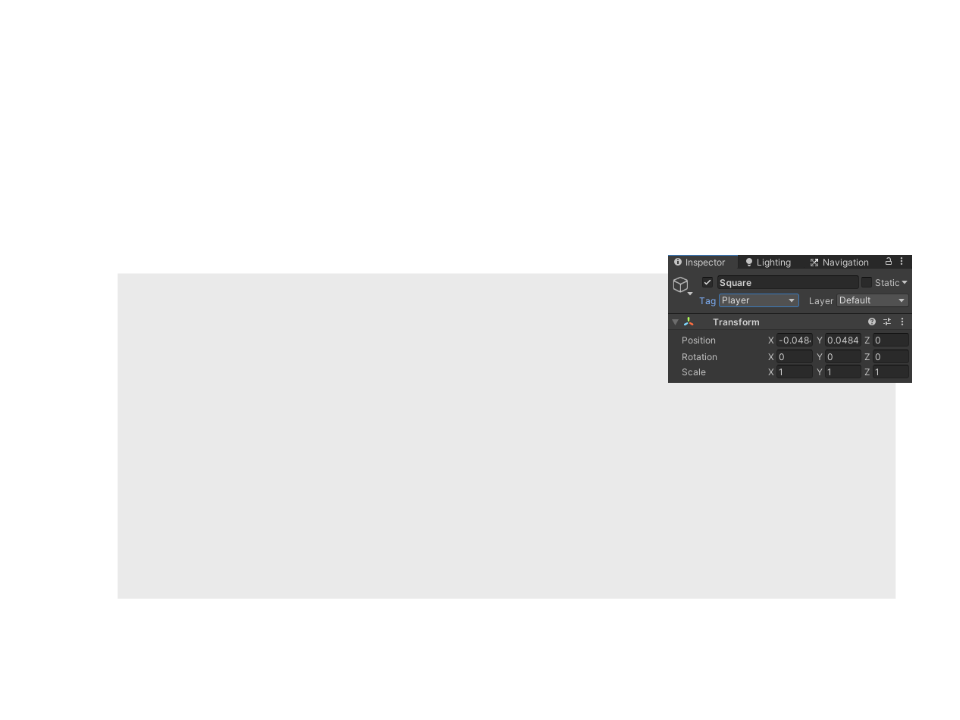
Example 7: Finding GameObjects by Tag
– It is always possible to locate GameObjects anywhere in the Scene hierarchy as long as
you have some information to identify them (name or tag).
public class Enemy : MonoBehaviour
{
private GameObject player;
private void Start()
{
player = GameObject.FindWithTag("Player");
}
void Update()
{
Debug.Log("Player is at: " + player.transform.position);
}
}
–
Important: the method returns the first GameObject it finds with the specified tag. If a
scene contains multiple GameObjects with the specified tag, use the function
GameObject.FindGameObjectsWithTag (returns an array of GameObjects).
Scripting – Event Functions
•
A script in Unity is not like the traditional program where the
code runs continuously until it completes its task.
–
Instead, Unity controls scripts intermittently by calling certain functions
that are declared within the code.
–
These functions are known as event functions.
•
Update Events:
–
void Update() – Is called every frame.
–
void FixedUpdate() – has the frequency of the physics system (it is called every
fixed frame-rate frame). Always use FixedUpdate when manipulating a Rigidbody.
–
void LateUpdate() – Is called after all Update functions have been called. This is
useful to order script execution.

Scripting – Event Functions
•
•
Initialization Events:
–
void Start() – Is called on the frame when a script is enabled just before any of
the Update methods are called the first time.
–
void Awake() – is called when the script instance is being loaded. It is called when
the script object is initialized, regardless of whether or not the script is enabled.
Physics Events:
–
–
–
void OnCollisionEnter(Collision collision) – is called when the collider/rigidbody
has begun touching another rigidbody/collider.
void OnCollisionStay(Collision collision) – is called once per frame for every
collider/rigidbody that is touching the rigidbody/collider.
void OnCollisionExit(Collision collision) – is called when the collider/rigidbody
has stopped touching another rigidbody/collider.

Scripting – Event Functions
•
Physics Events (Triggers):
–
–
–
void OnTriggerEnter(Collider collider) – is called when the collider/rigidbody has
begun touching another collider that is a trigger.
void OnTriggerStay(Collider collider) – is called once per frame for every trigger
collider that is touching the rigidbody/collider.
void OnTriggerExit(Collider collider) – is called when the collider/rigidbody has
stopped touching another collider that is a trigger.
•
GUI Events:
– void OnGUI() – is called for rendering and handling GUI events.
List of Event Functions:

Scripting – Creating/Destroying GameObjects
•
Example 8: Creating Several Instances of a Prefab
–
Some games keep a constant number of objects in the scene, but it is very common for
characters, treasures and other object to be created and removed during gameplay.
public class GameManager : MonoBehaviour
{
public GameObject enemy;
void Start()
{
for (int i = 0; i < 5; i++) {
Instantiate(enemy);
}
}
}
–
The function Destroy is used to destroy game objects:
Destroy(gameObject, 0.5f);
•
The second parameter is optional and represents the amount of time to delay before destroying the object.
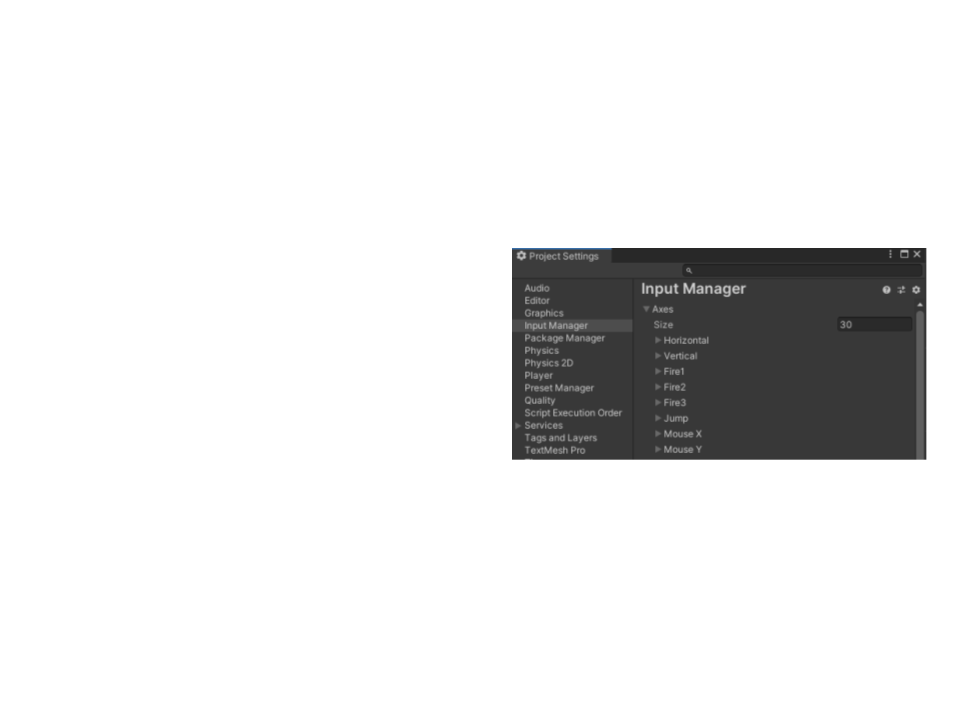
Unity – Input
•
•
Input allows the user to control your application using a
device, touch, or gestures.
–
–
–
–
–
Keyboards and mouse
Joysticks
Touch screens
Accelerometers or gyroscopes
VR and AR controllers
The Input Manager allows you to define input axes and their
associated actions.
–
Edit -> Project Settings (Input category).

Scripting – Input Axes
•
Example 9: Translating an Object using the Keyboard
–
We can use the input from the Horizontal and Vertical axes and the transform.Translate
method:
public class PlayerMovement : MonoBehaviour
{
public float moveSpeed = 10;
void Update()
{
float horizontalInput = Input.GetAxis("Horizontal");
float verticalInput = Input.GetAxis("Vertical");
transform.Translate(new Vector2(horizontalInput, verticalInput)
*
moveSpeed * Time.deltaTime);
}
}
–
Important: when using the Translate function to move an object, there is no collision
detection. Use rigidbodies when moving objects that require physical interaction.
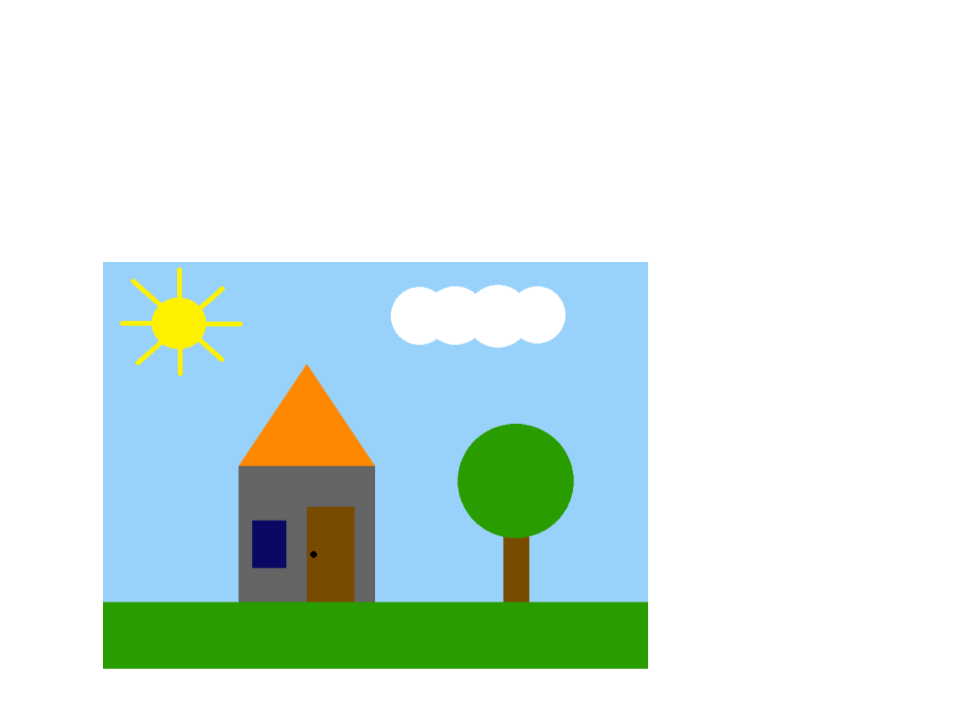
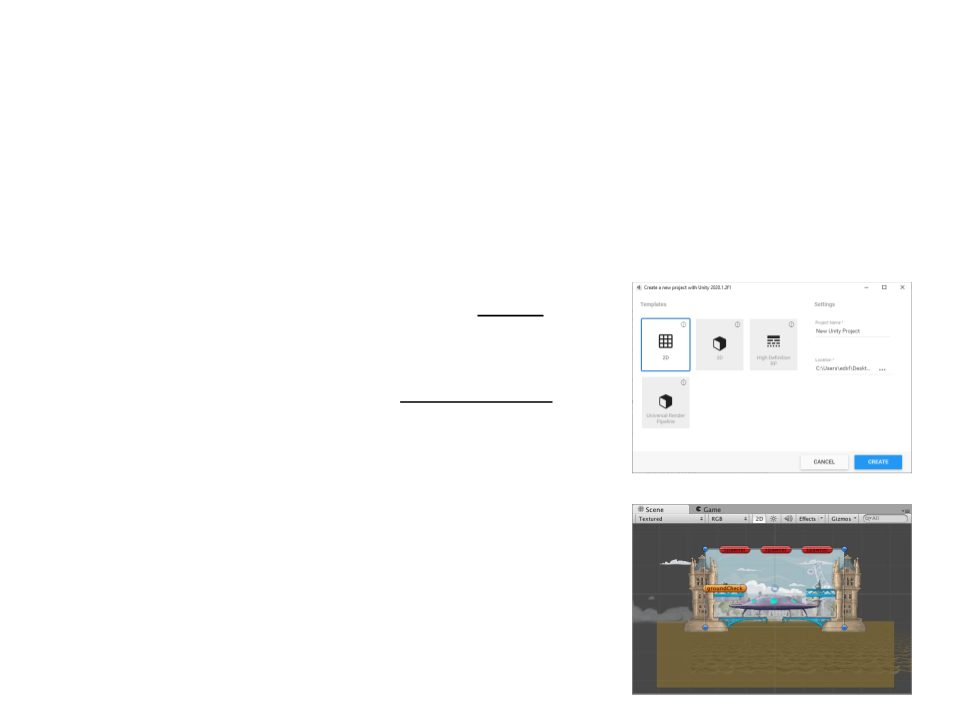
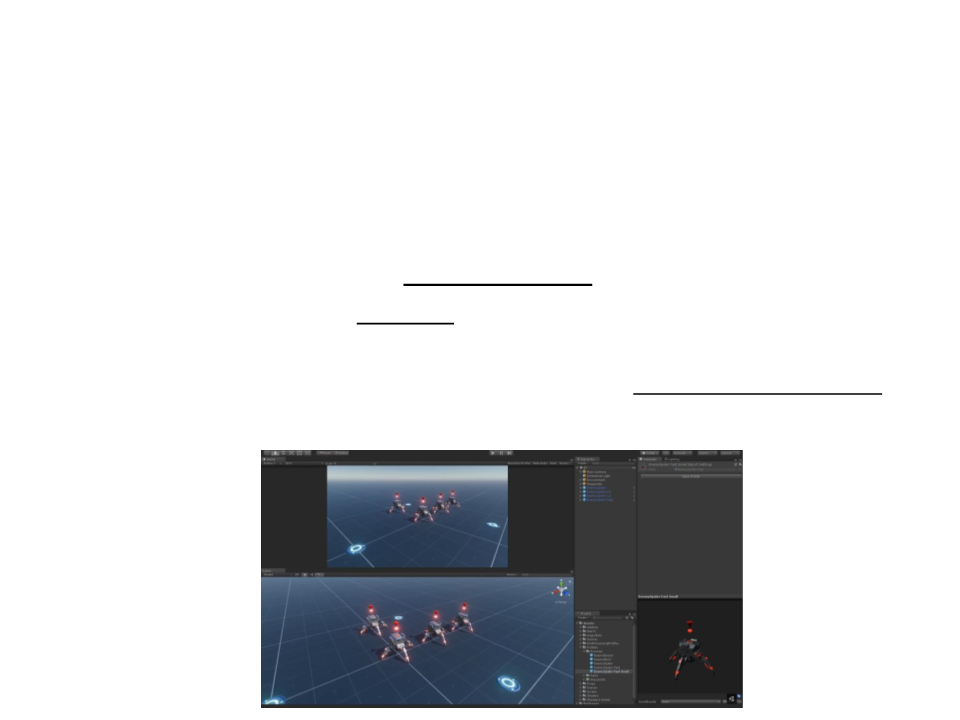
Exercise 1
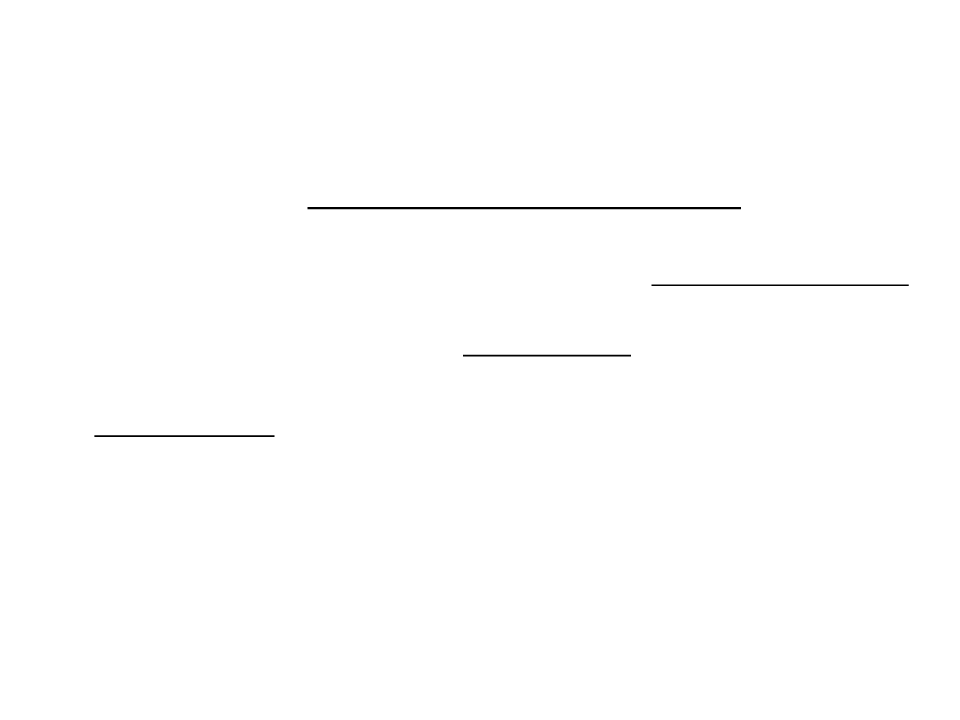
1
) Using primitive sprites (rectangles, circles, and triangles),
create in Unity a scene similar to the one illustrated below:
Important: use Unity’s
parenting system to
create a hierarchy and
combine sprites that
are part of the same
object.
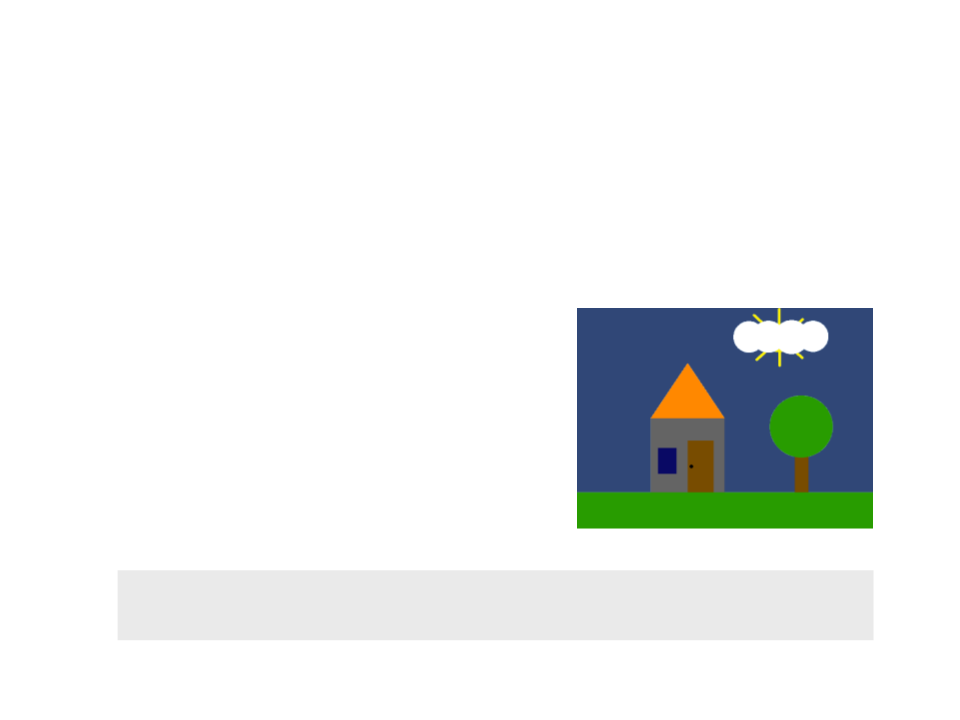
Exercise 2
2
) Continue the implementation of the last exercises and create a
script to move the sun using the keyboard arrows.
–
When the sun is behind the cloud, change the color of the background
to a darker color.
Hint: the color of a sprite can be
changed in a script by accessing the
color property of the SpriteRenderer
component of the object.
Example:
background.GetComponent<SpriteRenderer>().color = Color.grey;
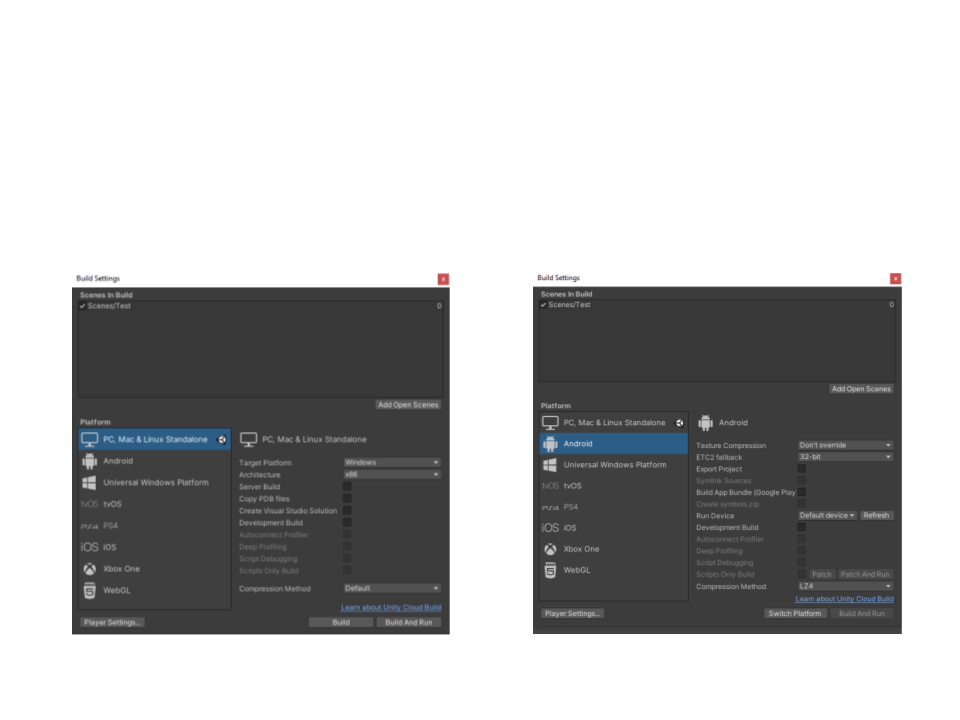
Building Multiplatform Projects
•
File -> Build Settings
PC
Android

Mobile Device Input
•
The Input class offers access to touchscreen, accelerometer
and geographical/location input.
–
Example 10: Touch input on mobile devices
public class TouchInput : MonoBehaviour{
public GameObject instObject;
void Update(){
foreach (Touch touch in Input.touches){
if (touch.phase == TouchPhase.Began){
Vector3 position = Camera.main.ScreenToWorldPoint(touch.position);
Instantiate(instObject, new Vector3(position.x, position.y, 0),
Quaternion.identity);
}
}
}
}

Mobile Device Accelerometer
•
As the mobile device moves, the accelerometer reports linear
acceleration changes along the three primary axes.
–
Example 11: Use accelerometer to change gravity on mobile devices
public class TouchInput : MonoBehaviour{
public GameObject instObject;
void Update(){
.
..
Physics2D.gravity = new Vector3(Input.acceleration.x * 9.81f,
Input.acceleration.y * 9.81f, 0);
}
}

Further Reading
•
Unity User Manual, Available at: https://docs.unity3d.com/2020.1/
Documentation/Manual/
–
Working in Unity
•
•
•
•
•
Unity’s interface
Asset workflow
Creating Gameplay
Editor Features
Publishing Builds
–
2D
•
Gameplay in 2D
•
Books
–
Jeremy G. (2017). Introduction to Game Design, Prototyping, and
Development: from the Concept to Playable Game - with Unity and C# (2nd
ed.). Boston, MA: Addison-Wesley Professional. ISBN: 978-0134659862
–
Hocking, J. (2018). Unity in Action: Multiplatform Game Development in C#
(
2nd ed.). Shelter Island, NY: Manning Publications. ISBN: 978-1617294969