
Computer Graphics
Lecture 06 – Light
Edirlei Soares de Lima
<edirlei.lima@universidadeeuropeia.pt>
The Physics of Light
•
•
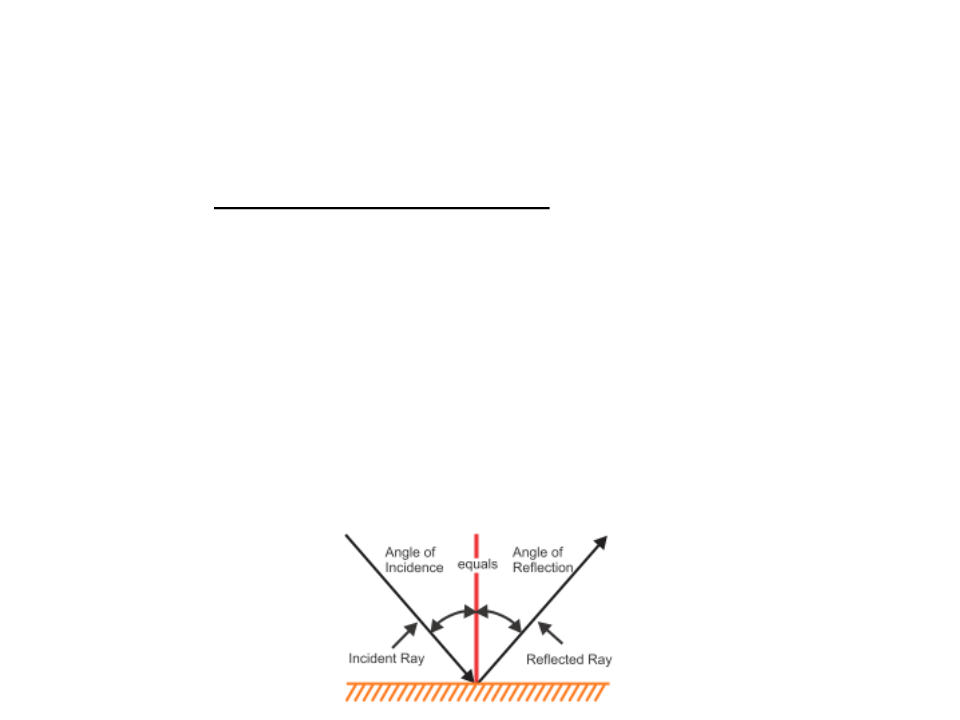
Light is a electromagnetic radiation of a frequency that can be
detected by the human eye (visible light).
From the optics view, light can be see as electromagnetic rays
that travel in a straight line from its source.
–
–
–
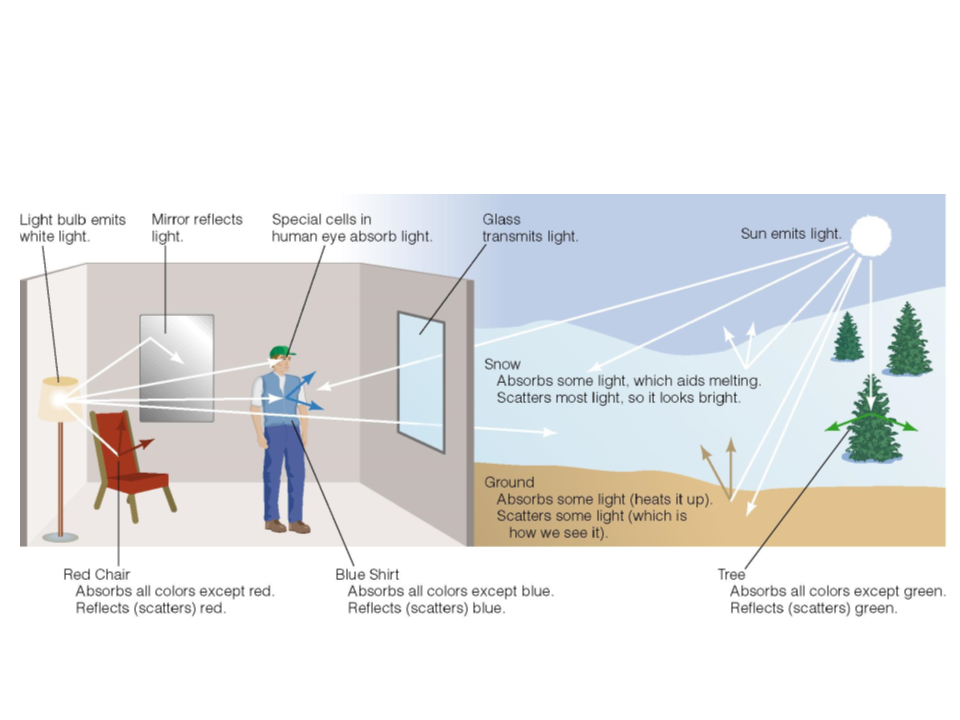
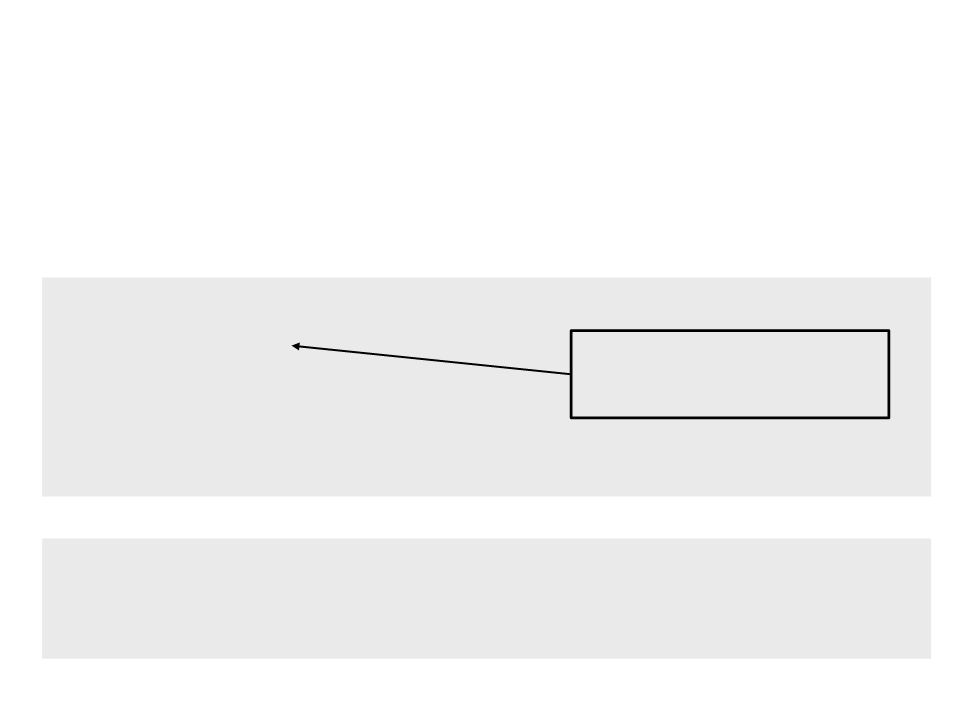
The light source emits rays of light.
When the light hits an object, some of the light bounces off the object.
If the reflected light hits our eyes (or the camera lens) – then we see
the object.
The Physics of Light
•
•
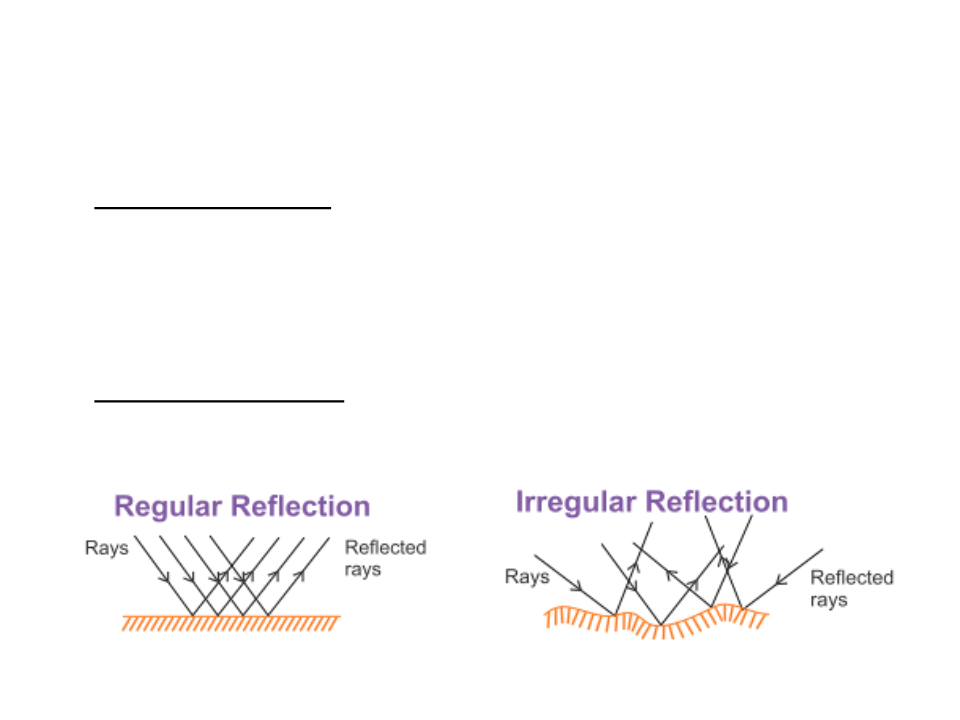
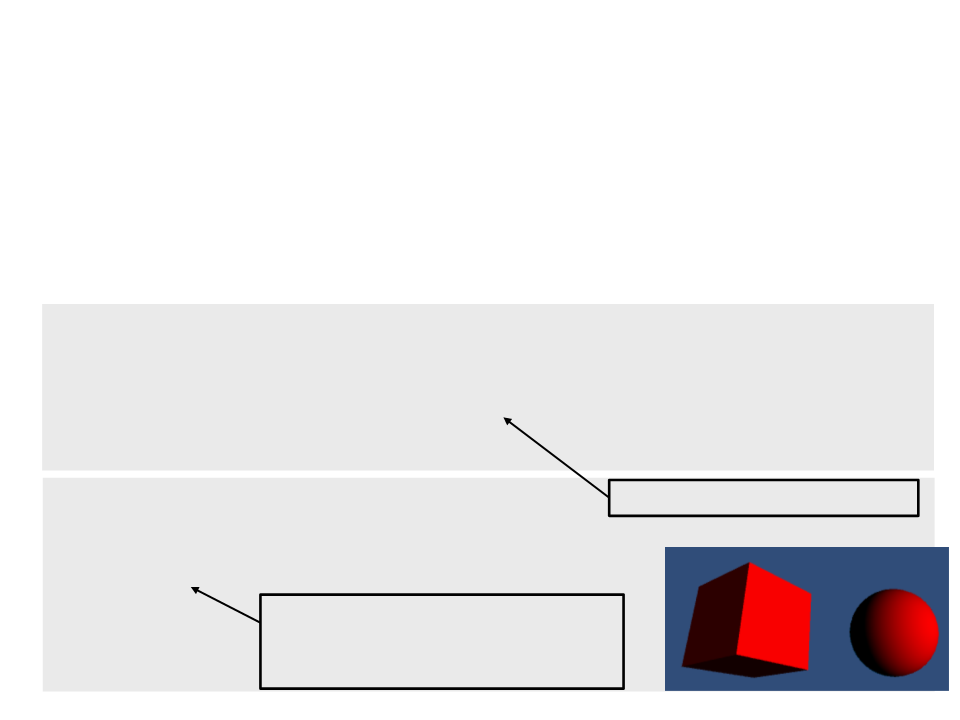
Regular Reflection occurs when the angle at which light
initially hits a surface is equal to the angle at which light
bounces off the same surface.
–
It occurs only when the rays fall on a highly smooth surface, such as a
mirror.
Irregular Reflection occurs when the rays fall on an irregular
surface and are scattered in different directions.
The Physics of Light
The Physics of Light
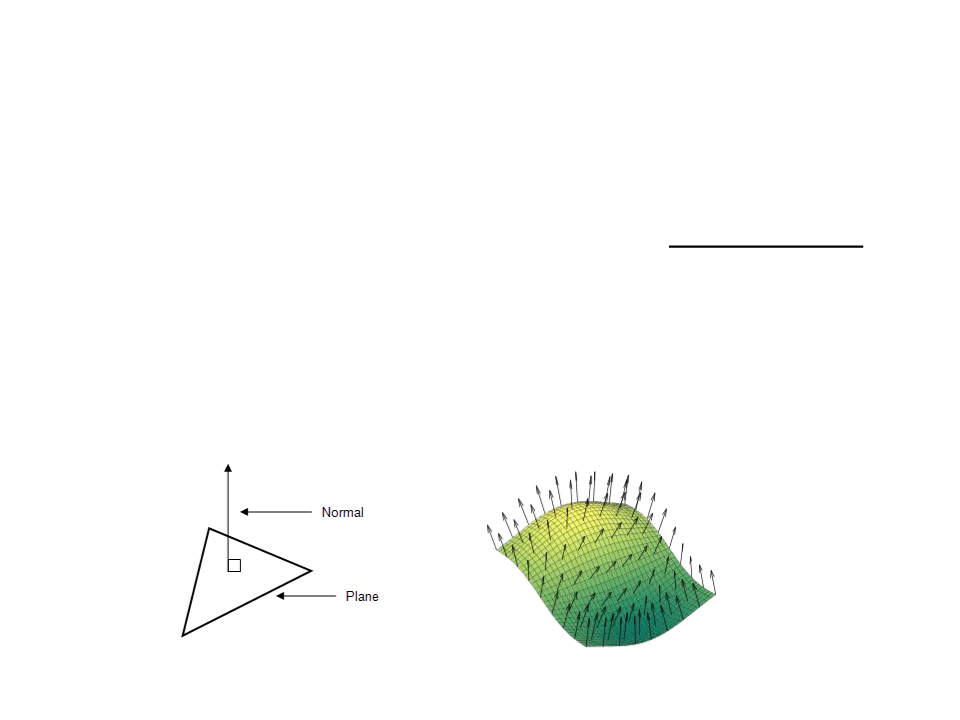
Surface Normals
•
•
When we simulate light in computer graphics, the object's
surface plays an important role. The surface normal vectors
define how light interacts with the surface.
To a surface at a point P, the normal is a vector that is
perpendicular to the tangent plane to that surface at P.
P
Normals in Unity Shaders
•
In order to access the surface normal in a Shader, we can add
a field to the vertex structure.
struct VertexData {
float4 position : POSITION;
float3 normal : NORMAL;
};
struct VertexToFragment {
float4 position : SV_POSITION;
float3 normal : NORMAL;
};
VertexToFragment MyVertexProgram(VertexData vert) {
VertexToFragment v2f;
v2f.position = UnityObjectToClipPos(vert.position);
v2f.normal = UnityObjectToWorldNormal(vert.normal);
return v2f;
Transform the normal from
local space to world space.
}
Lights in Unity Shaders
•
Unity allows Shaders to have direct access to the light sources
in the current scene through built-in variables:
_WorldSpaceLightPos0 : float4 - directional lights (world space
direction)
_LightColor0 : fixed4 - Light color multiplied by the intensity
float4 MyFragmentProgram(VertexToFragment v2f) : SV_TARGET {
..
.
float3 lightDir = _WorldSpaceLightPos0.xyz;
float4 lightColor = _LightColor0.rgba;
...
Defined in "Lighting.cginc“,
which must be included.
}

Diffuse Shading
•
Many objects in the world have a surface appearance that is
not at all shiny (e.g. newspaper, unfinished wood, and dry,
unpolished stones).
–
Such objects do not have a color change with a change in viewpoint.
•
These objects can be considered as behaving as Lambertian
objects.
Lambertian Shading Model
•
•
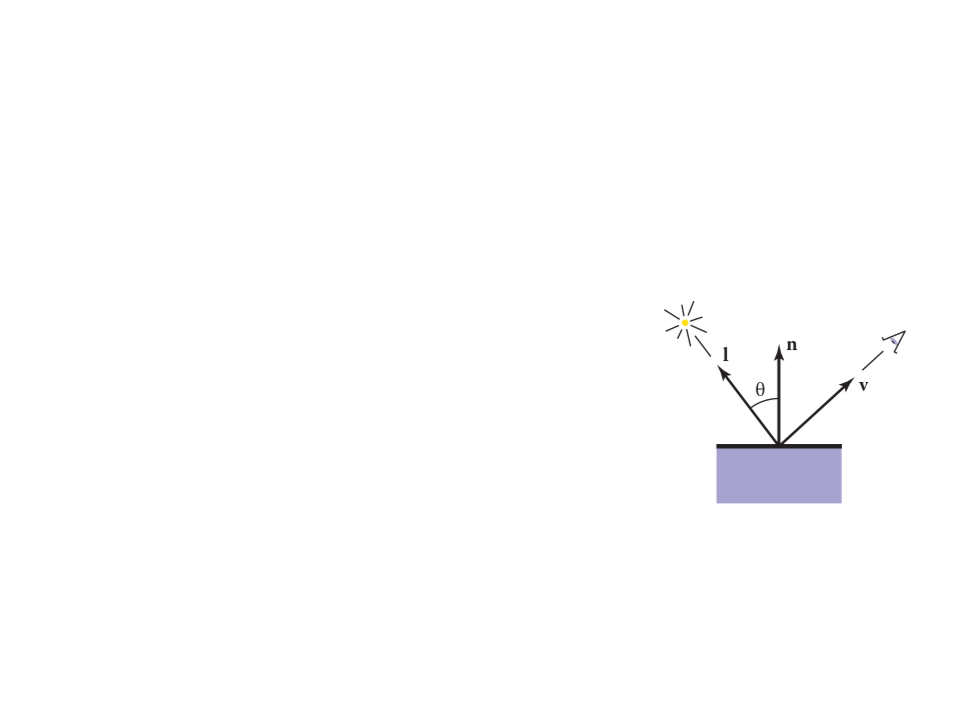
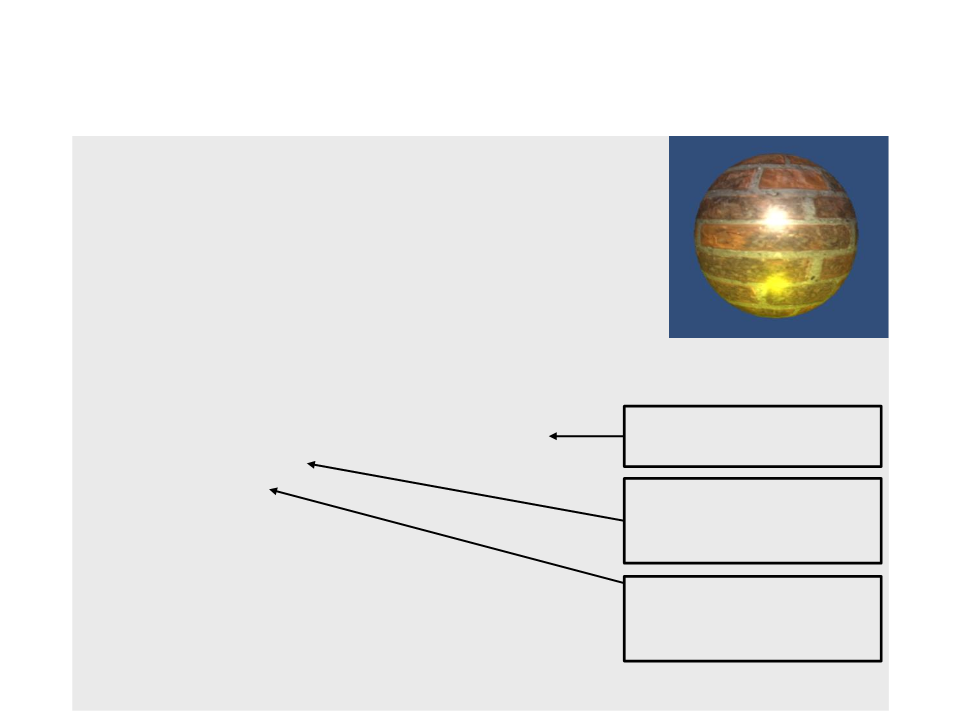
Lambertian Shading (Diffuse): the color of a surface is
proportional to the cosine of the angle between the surface
normal and the direction to the light (Lambert’s cosine law).
ꢀ
= ꢀꢁꢀꢂꢅꢆꢇ(0, ꢃ ∙ ꢄ)
where:
–
–
–
–
ꢀ is the pixel color;
ꢀꢁ is the diffuse coefficient, or the surface color;
ꢀꢂ is the intensity of the light source;
ꢃ ∙ ꢄ = cos θ
Lambertian Shading in Unity
•
In order to implement a Lambertian Shader we simply use the
Lambertian equation to compute the color in the fragment
program.
float4 MyFragmentProgram(VertexToFragment v2f) : SV_TARGET{
float3 lightDir = _WorldSpaceLightPos0.xyz;
float4 lightColor = _LightColor0.rgba;
return _Color * lightColor * DotClamped(lightDir,
normalize(v2f.normal));
}
.
Pass{
Tags{
LightMode" = "ForwardBase"
..
Avoids negative dot products.
"
}
CGPROGRAM
...
We also need to specify the light
mode used by the rendering
pipeline. In this case: ForwardBase.

Ambient Shading
•
•
One problem with the Lambertian shading is that any point
whose normal faces away from the light will be black.
–
In real life, light is reflected all over, and some light is incident from
every direction.
A common approach to solve this is to add an ambient term to
the equation:
ꢀ
= ꢀꢁ(ꢀꢈ + ꢀꢂꢅꢆꢇ(0, ꢃ ∙ ꢄ))
–
Where ꢀꢈ is the ambient color.
Ambient Shading in Unity
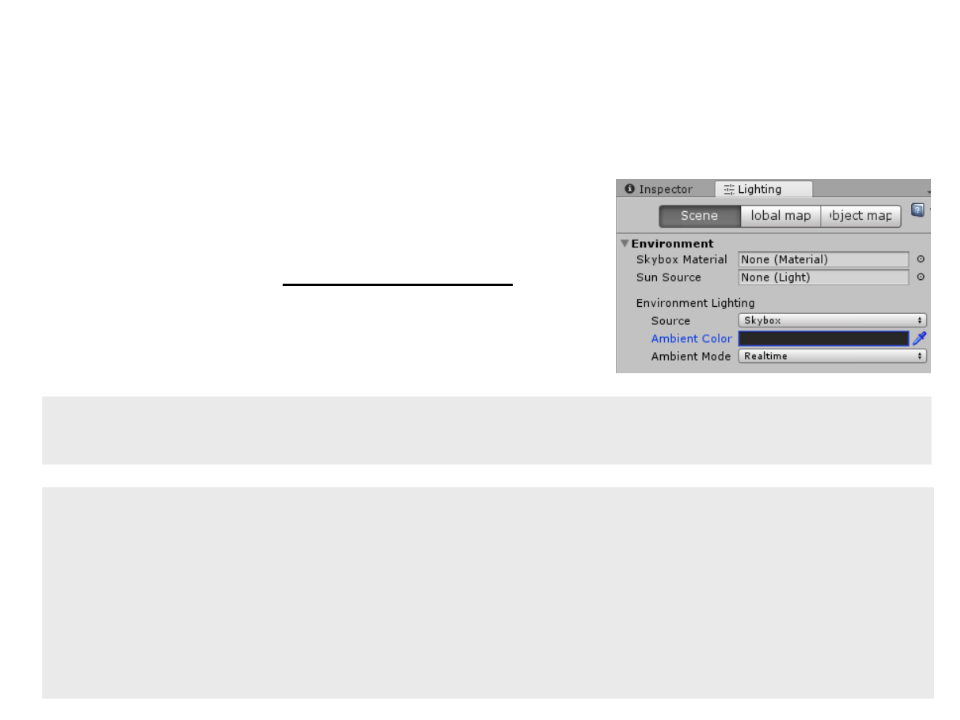
•
•
Unity has a built-in variable that
defines the ambient color, which is
defined in the Lightning Settings.
We can add this variable to the
Lambertian equation.
unity_AmbientSky : fixed4 - Sky ambient lighting color in gradient
ambient lighting case.
float4 MyFragmentProgram(VertexToFragment v2f) : SV_TARGET{
float3 lightDir = _WorldSpaceLightPos0.xyz;
float4 lightColor = _LightColor0.rgba;
return _Color * (unity_AmbientSky + (lightColor *
DotClamped(lightDir, normalize(v2f.normal))));
}
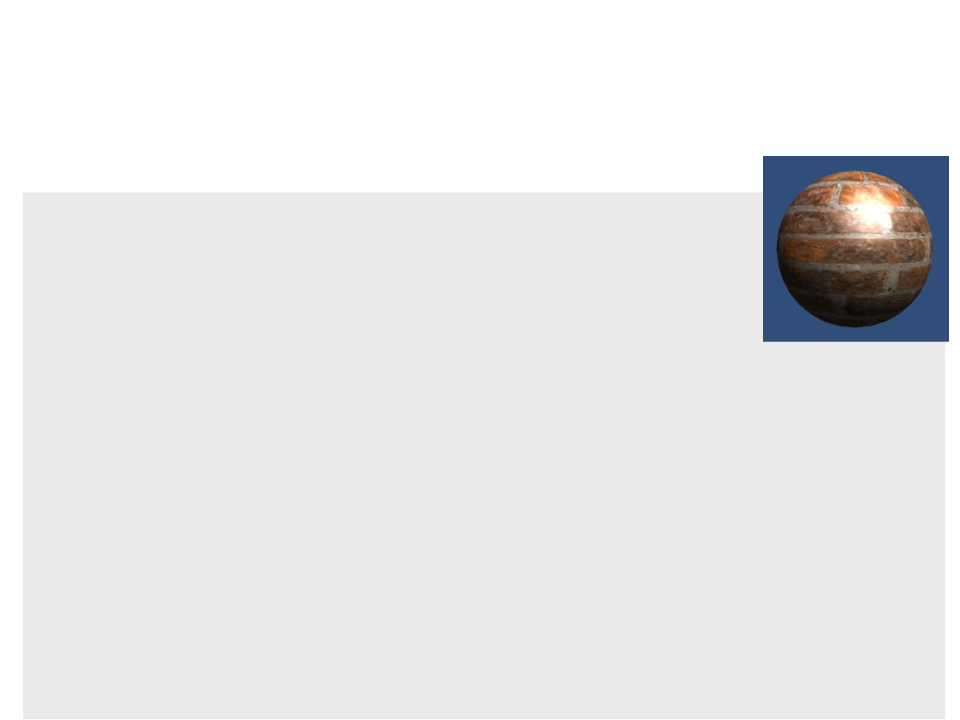
Specular Shading
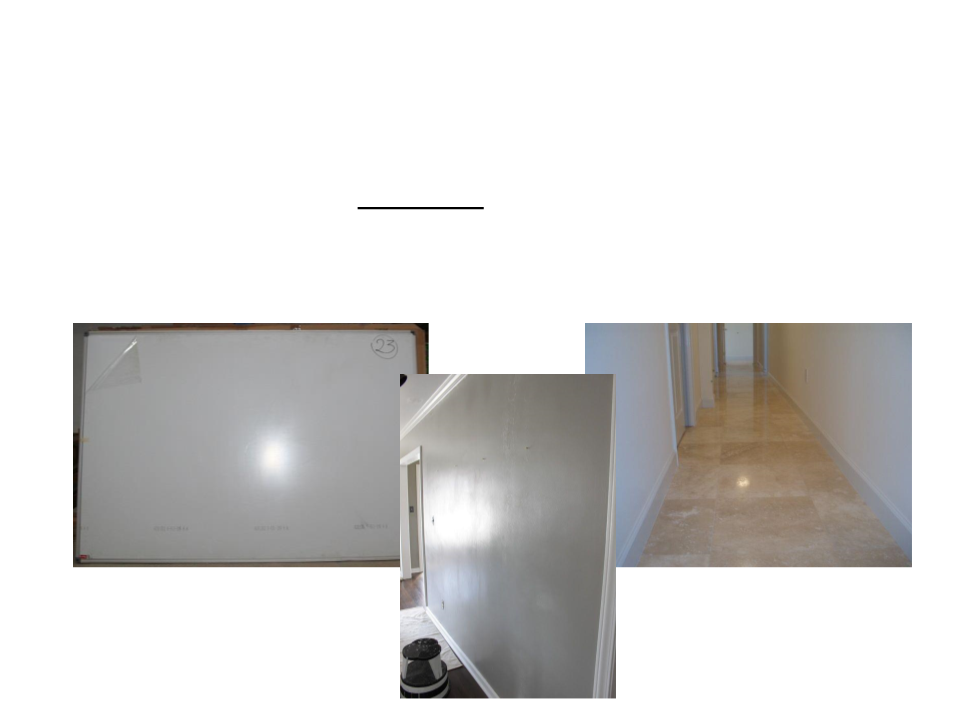
•
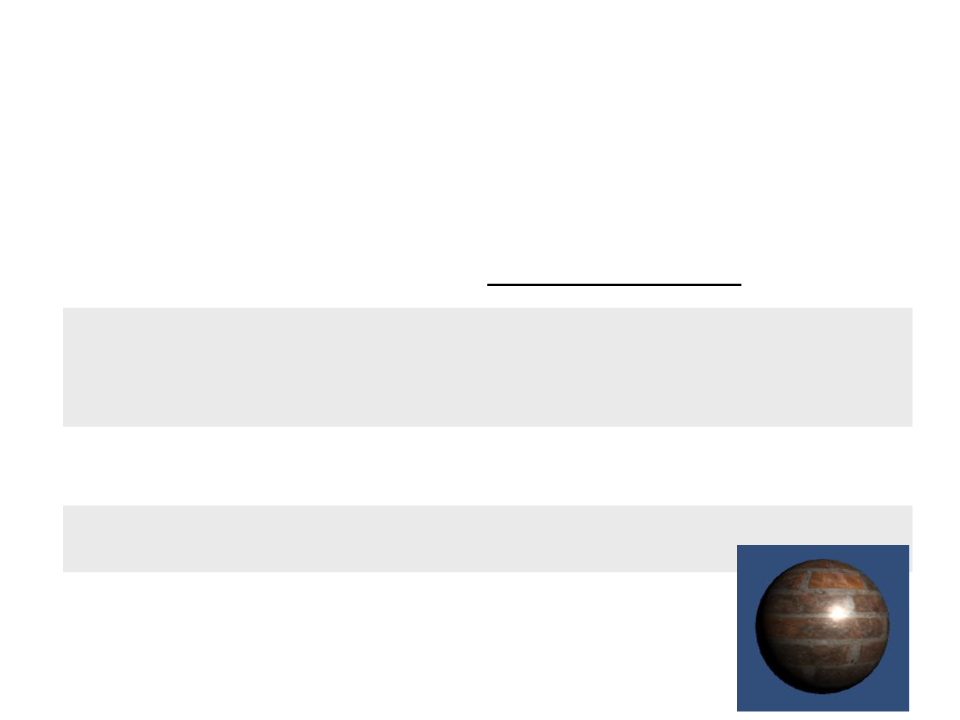
Some surfaces have highlights (e.g. polished tile floors, gloss
paint, whiteboards). These highlights have the color of the
light and move across the surface as the viewpoint moves.
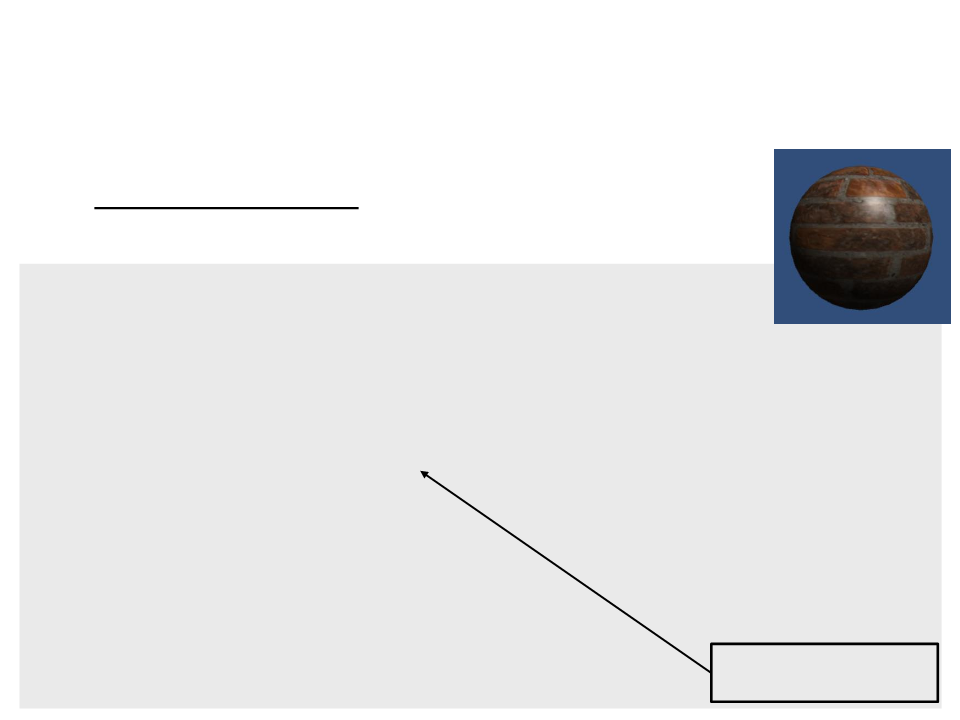
Phong Shading Model
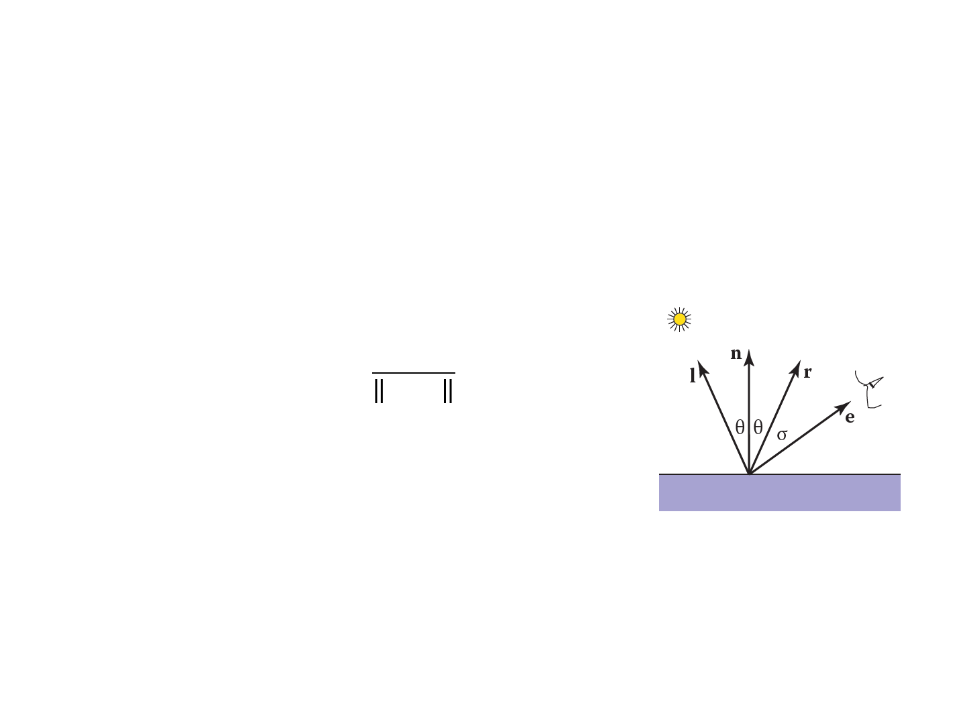
•
•
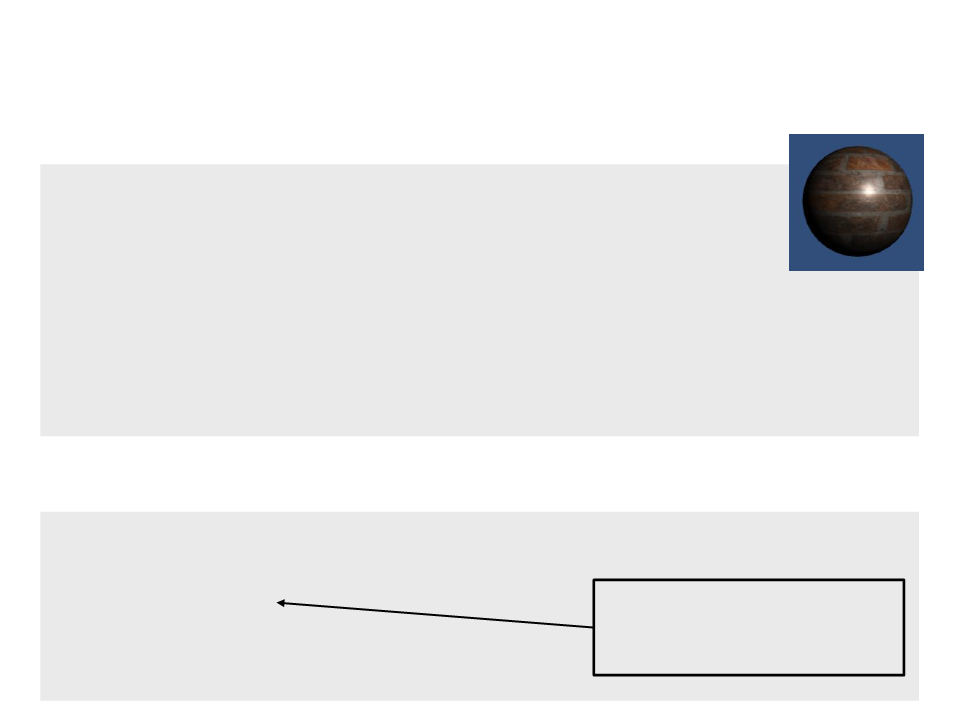
Phong Shading (Specular): describes the way a surface
reflects light as a combination of the diffuse reflection of
rough surfaces with the specular reflection of shiny surfaces.
ꢉ + ꢄ
ꢀ
= ꢀꢂ(ℎ ∙ ꢃ)ꢋ
ℎ =
ꢉ + ꢄ
where:
–
–
–
–
–
ꢀ is the pixel color;
ꢀꢂ is the intensity of the light source;
ꢉ is the direction to the eye;
ꢄ is the direction of the light;
ꢊ is the phong exponent;
Phong Shading in Unity
•
In order to implement a Phong Shader in Unity, we need to
know the direction from the surface to the viewer. This
requires the world-space position of the vertex.
struct VertexToFragment {
float4 position : SV_POSITION;
float3 normal : NORMAL;
float4 worldpos : TEXCOORD2;
};
VertexToFragment MyVertexProgram(VertexData vert) {
VertexToFragment v2f;
v2f.position = UnityObjectToClipPos(vert.position);
v2f.normal = UnityObjectToWorldNormal(vert.normal);
v2f.worldpos = mul(unity_ObjectToWorld, vert.position);
return v2f;
}
Transform the vertex position
from local space to world space.

Phong Shading in Unity
•
With the vertex position in world space, we can use the Phong
equation in fragment program:
Properties
{
_
_
_
Color("Color", Color) = (1, 1, 1, 1)
Smoothness("Smoothness", Range(0, 1)) = 0.5
SpecularColor("Specular", Color) = (0.5, 0.5, 0.5)
}
...
float _Smoothness;
float4 _SpecularColor;
float4 MyFragmentProgram(VertexToFragment v2f) :SV_TARGET{
float3 lightDir = _WorldSpaceLightPos0.xyz;
float3 viewDir = normalize(_WorldSpaceCameraPos - v2f.worldpos);
float4 lightColor = _LightColor0.rgba;
return lightColor * pow(DotClamped(normalize(lightDir + viewDir),
normalize(v2f.normal)), _Smoothness * 100);
}

Phong Shading in Unity
•
We can also combine of the diffuse reflection of
the Lambertian model with the specular reflection
of the Phong model:
float4 MyFragmentProgram(VertexToFragment v2f) :SV_TARGET{
float3 lightDir = _WorldSpaceLightPos0.xyz;
float3 viewDir = normalize(_WorldSpaceCameraPos - v2f.worldpos);
float4 lightColor = _LightColor0.rgba;
float4 difuse = _Color * (unity_AmbientSky + (lightColor *
DotClamped(lightDir, normalize(v2f.normal))));
float4 specular = _SpecularColor * lightColor * pow(DotClamped(
normalize(lightDir + viewDir),
normalize(v2f.normal)), _Smoothness * 100);
return difuse + specular;
}

Phong Shading in Unity
We can also add a texture to the shader:
•
Properties{
...
_MainTex("Albedo", 2D) = "white" {}
}
...
sampler2D _MainTex;
float4 _MainTex_ST;
struct VertexData {
float4 position : POSITION;
float3 normal : NORMAL;
float2 uv : TEXCOORD0;
};
struct VertexToFragment {
float4 position : SV_POSITION;
float2 uv : TEXCOORD0;
float3 normal : NORMAL;
float4 worldpos : TEXCOORD1;
};
Phong Shading in Unity
We can also add a texture to the shader:
•
VertexToFragment MyVertexProgram(VertexData vert) {
VertexToFragment v2f;
v2f.position = UnityObjectToClipPos(vert.position);
v2f.worldpos = mul(unity_ObjectToWorld, vert.position);
v2f.normal = UnityObjectToWorldNormal(vert.normal);
v2f.uv = TRANSFORM_TEX(vert.uv, _MainTex);
return v2f;
}
float4 MyFragmentProgram(VertexToFragment v2f) :SV_TARGET{
float3 lightDir = _WorldSpaceLightPos0.xyz;
float3 viewDir = normalize(_WorldSpaceCameraPos - v2f.worldpos);
float4 lightColor = _LightColor0.rgba;
float4 albedo = tex2D(_MainTex, v2f.uv).rgba * _Color;
float4 difuse = albedo * (unity_AmbientSky + (lightColor *
DotClamped(lightDir, normalize(v2f.normal))));
float4 specular = _SpecularColor * lightColor * pow(DotClamped(
normalize(lightDir + viewDir),
normalize(v2f.normal)), _Smoothness * 100);
return difuse + specular;
}
Phong Shading in Unity
•
Energy conservation problem: when light hits a
surface, only part of it bounces off as specular light.
float4 MyFragmentProgram(VertexToFragment v2f) :SV_TARGET
float3 lightDir = _WorldSpaceLightPos0.xyz;
float3 viewDir = normalize(_WorldSpaceCameraPos - v2f.worldpos);
float3 lightColor = _LightColor0.rgb;
float3 albedo = tex2D(_MainTex, v2f.uv).rgb * _Color;
float oneMinusReflectivity;
albedo = EnergyConservationBetweenDiffuseAndSpecular(albedo,
_SpecularColor, oneMinusReflectivity);
float3 difuse = albedo * (unity_AmbientSky + (lightColor *
DotClamped(lightDir, normalize(v2f.normal))));
float3 specular = _SpecularColor * lightColor * pow(DotClamped(
normalize(lightDir + viewDir),
normalize(v2f.normal)), _Smoothness * 100);
return float4(difuse + specular, 1);
Energy conservation
}
correction.
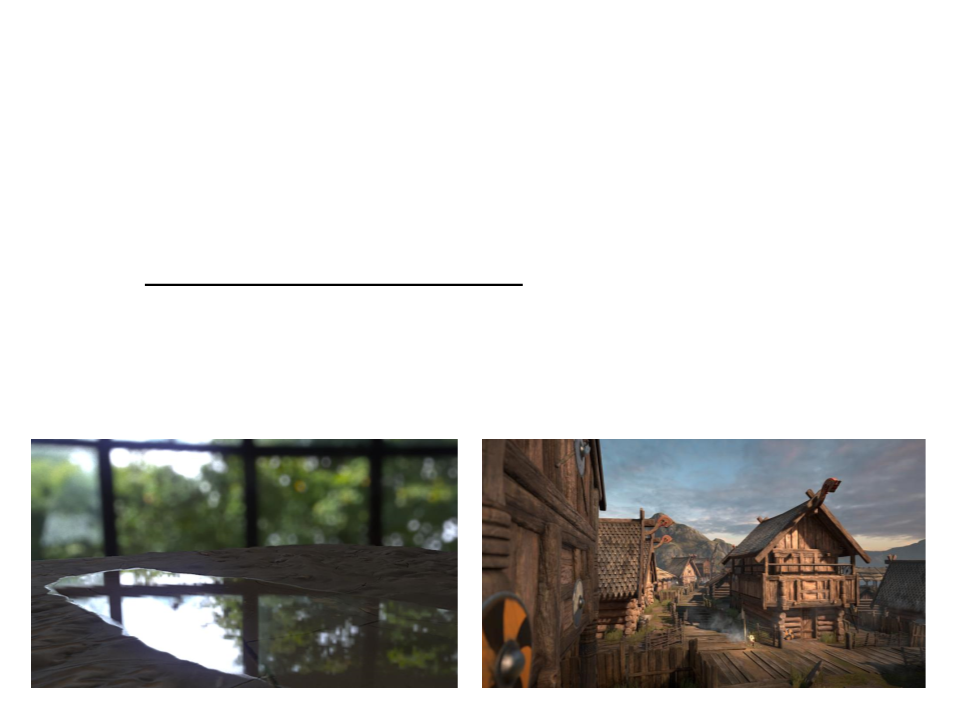
Physically Based Shading
•
Physically Based Shading is a model that seeks to render
computer graphics in a way that more accurately simulates
the flow of light of the real world.
–
Phong has been used by the game industry for a long time, but
nowadays is being replaced by physically-based shading.
–
Unity introduced Physically Based Shading in Unity 5 (2015)
Physically Based Shading in Unity
•
Unity provides some functions that allow us to easy use the
physically based lightning computations in our shaders.
CGPROGRAM
#
.
#
pragma target 3.0
Just to make sure that Unity
selects an appropriated
shader level (3.0)
..
include "UnityPBSLighting.cginc"
half4 UNITY_BRDF_PBS(half3 diffColor, half3 specColor,
half oneMinusReflectivity, half smoothness,
half3 normal, half3 viewDir,
UnityLight light, UnityIndirect gi)

Physically Based Shading in Unity
float4 MyFragmentProgram(VertexToFragment v2f) :SV_TARGET{
float3 lightDir = _WorldSpaceLightPos0.xyz;
float3 viewDir = normalize(_WorldSpaceCameraPos - v2f.worldpos);
float3 lightColor = _LightColor0.rgb;
float3 albedo = tex2D(_MainTex, v2f.uv).rgb * _Color;
float oneMinusReflectivity;
albedo = EnergyConservationBetweenDiffuseAndSpecular(albedo,
_SpecularColor, oneMinusReflectivity);
UnityLight light;
light.color = lightColor;
light.dir = lightDir;
light.ndotl = DotClamped(normalize(v2f.normal),
lightDir);
UnityIndirect indirectLight;
indirectLight.diffuse = 0;
indirectLight.specular = 0;
return UNITY_BRDF_PBS(albedo, _SpecularColor, oneMinusReflectivity,
_
Smoothness, normalize(v2f.normal), viewDir,
light, indirectLight);
}

Multiple Lights
•
•
In order to add support for multiple lights, we need to add
more passes to the shader.
These passes will have nearly identical code, so it is better to
move the shader code to an include file.
–
The include file must have the extension ".cginc". Then it can be
included in the main shader program:
#include "LightShader.cginc"
–
When writing an include file is always important to prevent
redefinitions of inclusions:
#
#
.
#
if !defined(LIGHTSHADER_INCLUDED)
define LIGHTSHADER_INCLUDED
..
endif

Include file: LightShader.cginc
if !defined(LIGHTSHADER_INCLUDED)
define LIGHTSHADER_INCLUDED
#
#
#include "UnityPBSLighting.cginc"
float4 _Color;
...
struct VertexData {
..
.
};
struct VertexToFragment {
..
.
};
VertexToFragment MyVertexProgram(VertexData vert) {
...
}
float4 MyFragmentProgram(VertexToFragment v2f) :SV_TARGET{
...
}
#endif
Multiple Lights – Main Shader
SubShader{
Pass{
Tags{"LightMode" = "ForwardBase"}
CGPROGRAM
#
#
#
#
pragma target 3.0
pragma vertex MyVertexProgram
pragma fragment MyFragmentProgram
include "LightShader.cginc"
ENDCG
}
Pass{
Tags{"LightMode" = "ForwardAdd"}
Blend One One
ZWrite Off
CGPROGRAM
The second pass will be
added to the base pass.
Combines the results of
the passes through a
additive blending.
#
#
#
#
pragma target 3.0
pragma vertex MyVertexProgram
pragma fragment MyFragmentProgram
include "LightShader.cginc"
The second pass don’t
need to write the
z-buffer.
ENDCG
}
}
Point Lights
•
•
When we use directional light, _WorldSpaceLightPos0 contains
the direction of the light. But when we have a point light, the
variable represents the actual position of the light.
_
WorldSpaceLightPos0 : float4 - Directional lights: (world
space direction, 0).
Other lights: (world space
position, 1).
So we need to compute the direction of the point light:
float3 lightDir = normalize(_WorldSpaceLightPos0.xyz –
v2f.worldpos);
Note: the base pass only renders directional lights.
Point lights must be render in other passes.

Point Lights
•
To simplify and organize our shader, we can create a function
to create the light:
UnityLight CreateLight(VertexToFragment v2f) {
UnityLight light;
light.dir = normalize(_WorldSpaceLightPos0.xyz - v2f.worldpos);
light.color = _LightColor0.rgb;
light.ndotl = DotClamped(normalize(v2f.normal), light.dir);
return light;
}

Point Lights
•
Now we simply call the CreateLight function in the fragment
program:
float4 MyFragmentProgram(VertexToFragment v2f) :SV_TARGET{
float3 viewDir = normalize(_WorldSpaceCameraPos - v2f.worldpos);
float3 albedo = tex2D(_MainTex, v2f.uv).rgb * _Color;
float oneMinusReflectivity;
albedo = EnergyConservationBetweenDiffuseAndSpecular(albedo,
_SpecularColor, oneMinusReflectivity);
UnityIndirect indirectLight;
indirectLight.diffuse = 0;
indirectLight.specular = 0;
return UNITY_BRDF_PBS(albedo, _SpecularColor,
oneMinusReflectivity, _Smoothness,
normalize(v2f.normal), viewDir,
CreateLight(v2f), indirectLight);
}

Point Lights – Attenuation and Range
•
•
Point lights have two additional properties:
–
Light Attenuation: the distance of the light to the object's surface
effects the intensity of the light that hits the surface.
–
Light Range: in real life, photons keep moving until they hit something.
But with distance, they become so weak that we can no longer see it.
Unity provides a macro that simplifies the process to calculate
the correct attenuation factor:
UNITY_LIGHT_ATTENUATION(attenuation, shadowcoord, vertexWorldPos);
Point Lights – Attenuation and Range
#include "AutoLight.cginc"
UnityLight CreateLight(VertexToFragment v2f) {
UnityLight light;
light.dir = normalize(_WorldSpaceLightPos0.xyz - v2f.worldpos);
UNITY_LIGHT_ATTENUATION(attenuation, 0, v2f.worldpos);
light.color = _LightColor0.rgb * attenuation;
light.ndotl = DotClamped(normalize(v2f.normal), light.dir);
return light;
}
•
We also have to change the second pass of the main shader program:
.
#
#
#
#
..
pragma vertex MyVertexProgram
pragma fragment MyFragmentProgram
define POINT
Used by the attenuation
macro to know when a point
light is being rendered.
include "LightShader.cginc"
ENDCG
...
Point Light and Directional Light
•
•
In order to combine a point light with a directional light, our
shader must know how to correctly compute the light direction
depending on the type of light that is being rendered.
We can use the POINT keyword:
UnityLight CreateLight(VertexToFragment v2f) {
UnityLight light;
#
#
#
if defined(POINT)
light.dir = normalize(_WorldSpaceLightPos0.xyz - v2f.worldpos);
else
light.dir = _WorldSpaceLightPos0.xyz;
endif
UNITY_LIGHT_ATTENUATION(attenuation, 0, v2f.worldpos);
light.color = _LightColor0.rgb * attenuation;
light.ndotl = DotClamped(normalize(v2f.normal), light.dir);
return light;
}

Point Light and Directional Light
•
•
Problem with keywords: they are applied during compilation
time.
If we want our shader to work with all combinations of
directional and point lights, we need to compile multiple
versions of the shader.
–
This can be done with the multi_compile command:
...
Blend One One
ZWrite Off
CGPROGRAM
#
#
#
#
#
pragma target 3.0
pragma multi_compile DIRECTIONAL POINT
pragma vertex MyVertexProgram
pragma fragment MyFragmentProgram
include "LightShader.cginc"
ENDCG
...
Spot Lights
•
•
Spot lights are very similar to point lights. In addition, the
UNITY_LIGHT_ATTENUATION macro already takes care of the
computations to create the light cone shape.
We can simply add the SPOT keyword to our shader:
.
#
.
..
pragma multi_compile DIRECTIONAL POINT SPOT
..
...
#if defined(POINT) || defined(SPOT)
light.dir = normalize(_WorldSpaceLightPos0.xyz - v2f.worldpos);
#else
light.dir = _WorldSpaceLightPos0.xyz;
#
.
endif
..

Unity Rendering Pipeline
•
Unity supports two main rendering paths:
–
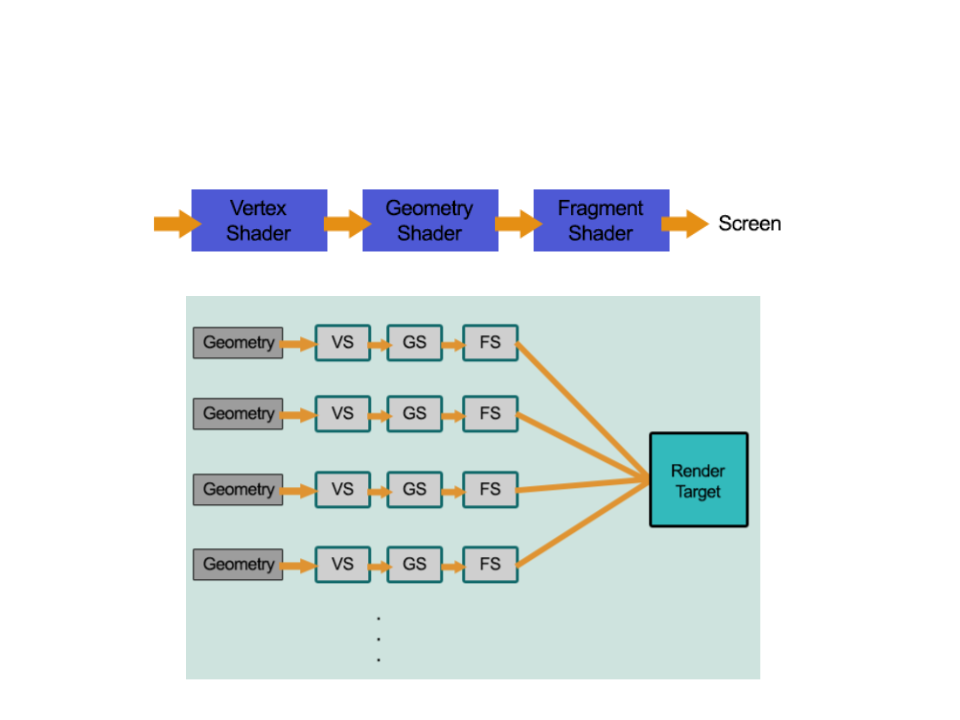
Forward Rendering: renders each object in one or more passes,
depending on lights that affect the object.
•
Is based on the traditional linear graphics pipeline, where each geometry is
processed by the pipeline (one at a time) to produce the final image.
–
Deferred Rendering: renders each object once on the first pass and
stores shading information into G-buffer textures. Additional passes
compute lighting based on G-buffer and depth in screen space.
•
The rendering is "deferred" until all of the geometries have been processed by the
pipeline. The final image is produced by applying shading/lightning at the end.
Forward Rendering
Forward Rendering
•
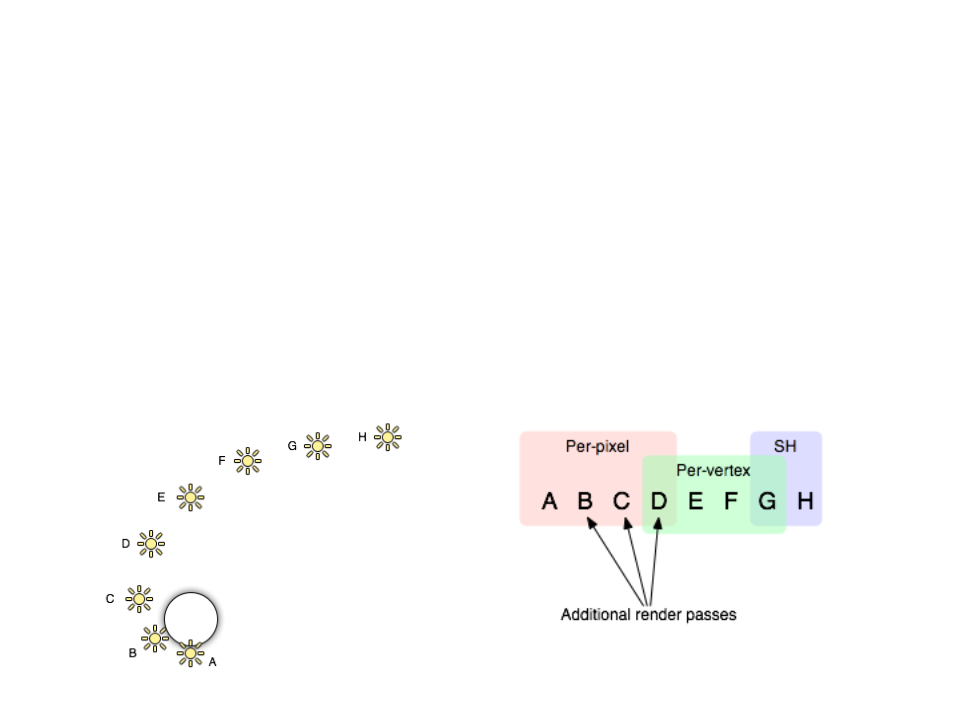
In Forward Rendering, lights can be rendered in 3 different ways:
–
Some lights that affect each object are rendered in fully per-pixel mode
(number defined by the Pixel Light Count – Quality Setting).
–
–
Up to 4 point lights are calculated per-vertex.
The other lights are computed as spherical harmonics (SH – faster
method, but is only an approximation).
Note: groups overlap reduces the "light popping" effect.
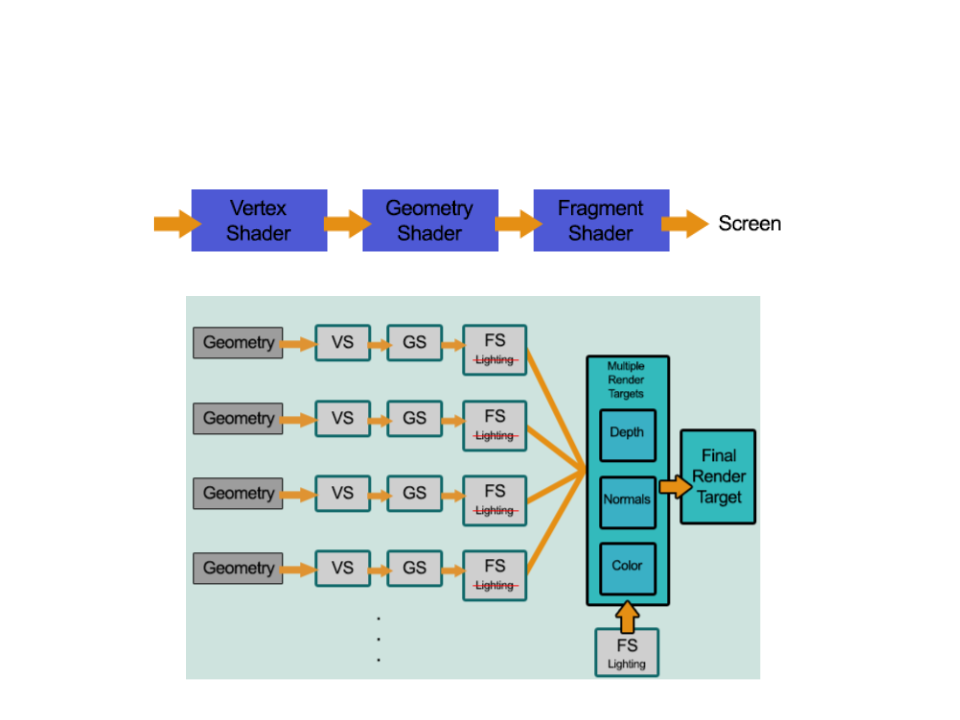
Deferred Rendering
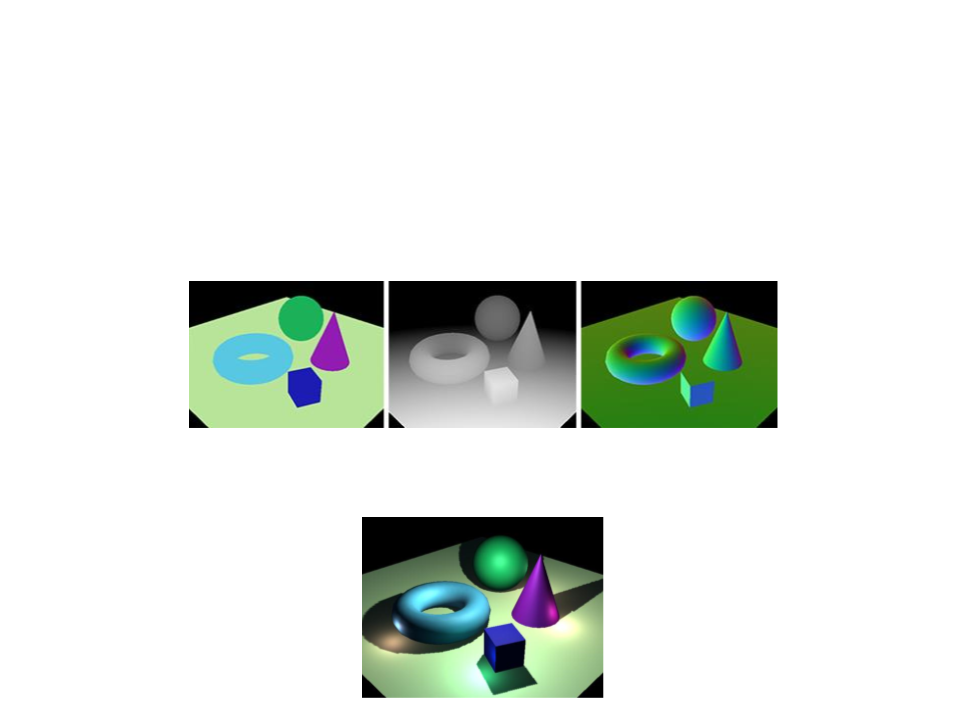
Deferred Rendering
•
In Deferred Rendering, each object is rendered once on the first pass and
shading information is stored into G-buffer textures using multiple render
targets (MRT).
Color
Depth
Normal
•
Additional passes compute lighting based on G-buffer information in
screen space:
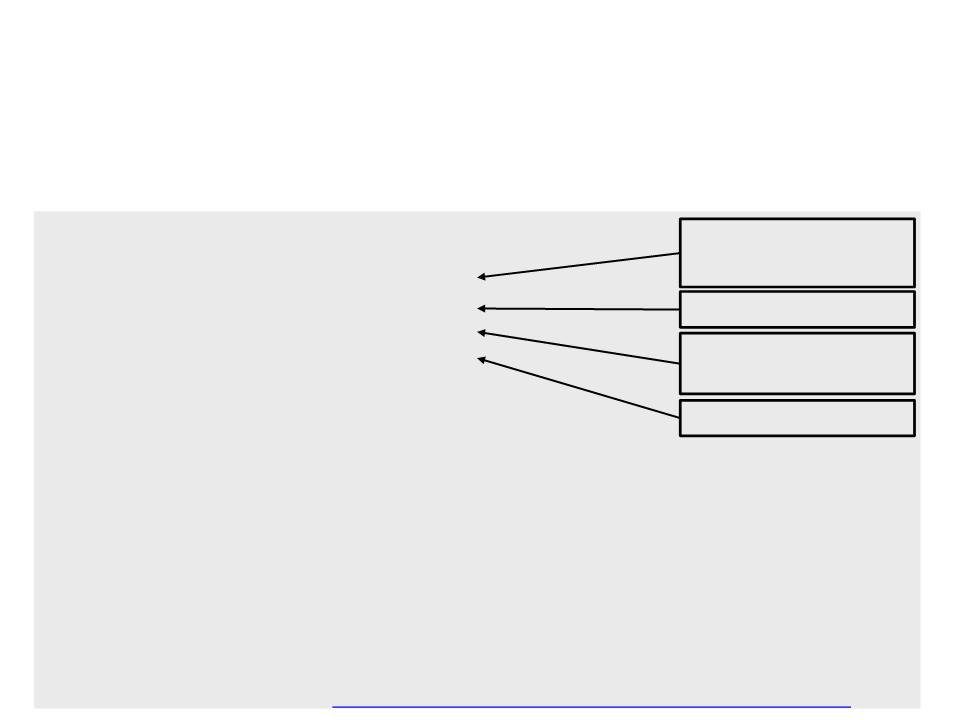
Deferred Shaders
The main difference between a forward shader and deferred
shader is the output of the fragment program:
•
struct FragmentOutput{
Diffuse albedo and
the surface occlusion.
#
if defined(DEFERRED_PASS)
float4 gBuffer0 : SV_Target0;
float4 gBuffer1 : SV_Target1;
float4 gBuffer2 : SV_Target2;
float4 gBuffer3 : SV_Target3;
else
Specular color.
World-space normal
vectors.
#
float4 color : SV_Target;
#endif
Emission lighting.
};
FragmentOutput MyFragmentProgram (Interpolators i) {
FragmentOutput output;
#
#
#
if defined(DEFERRED_PASS)
//fill the buffers
else
output.color = color;
endif
return output;
}
Implementation Tutorial: http://catlikecoding.com/unity/tutorials/rendering/part-13/
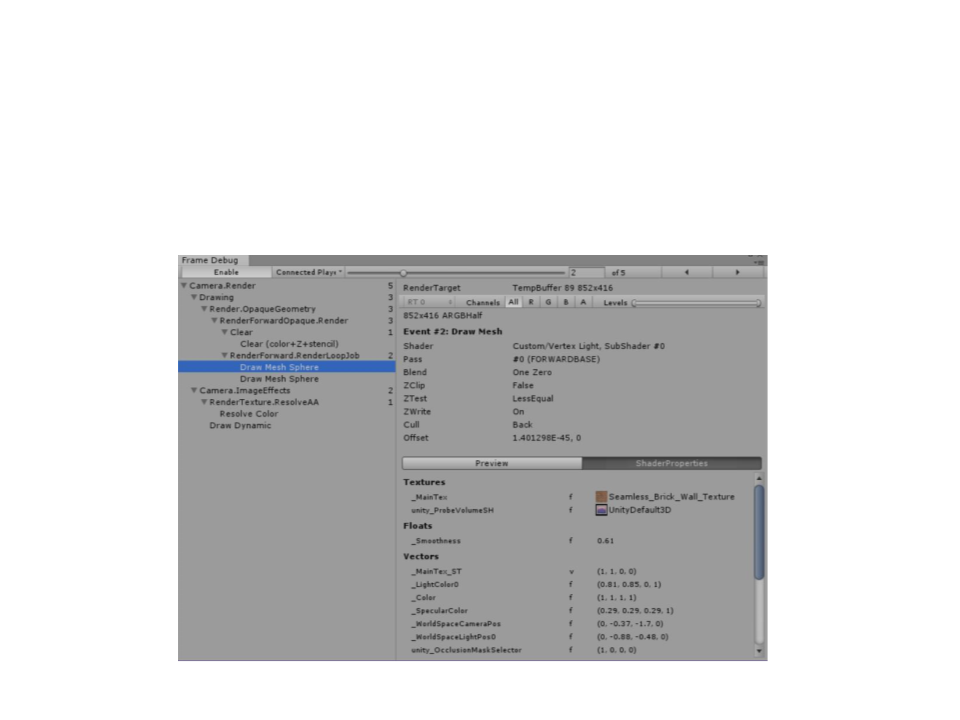
Frame Debugger
•
Window->Frame Debugger
Further Reading
•
•
•
Hughes, J. F., et al. (2013). Computer Graphics: Principles
and Practice (3rd ed.). Upper Saddle River, NJ: Addison-
Wesley Professional. ISBN: 978-0-321-39952-6.
–
Chapter 26: Light
–
Chapter 27: Materials and Scattering
Marschner, S., et al. (2015). Fundamentals of Computer
Graphics (4th ed.). A K Peters/CRC Press. ISBN: 978-
1482229394.
–
Chapter 10: Surface Shading
Chapter 18: Light
–
Web:
–
http://catlikecoding.com/unity/tutorials/rendering/part-4/
–